Blog

  • RV Solar Products: What They Are and How They Work

    RV Solar Products: What They Are and How They Work

    If you’ve spent any time researching power options for van life or full-time RVing, you’ve probably run into a wall of jargon. RV solar products cover a wide range of components—and the confusing part is that none of them work in isolation. A solar panel without a charge controller is a fire risk. A lithium battery bank without a proper inverter is just dead weight. Understanding how these pieces interact is what separates a system that actually powers your lifestyle from one that disappoints on the first cloudy afternoon.

    This article breaks down each major component category, explains what it does, and tells you what actually matters when evaluating one for your rig.

    The Four Core Components of Any RV Solar System

    Every functional RV solar setup, from a weekend warrior’s basic kit to a full-timer’s elaborate roof array, relies on the same four building blocks: solar panels, a charge controller, a battery bank, and an inverter. Some products combine two of these functions in one unit. That’s fine—but you still need all four functions covered.

    Solar Panels

    Panels are the obvious starting point, but the choice isn’t simply “more watts is better.” Roof space on an RV is finite and often irregular. Vents, AC units, and skylights eat into usable area fast.

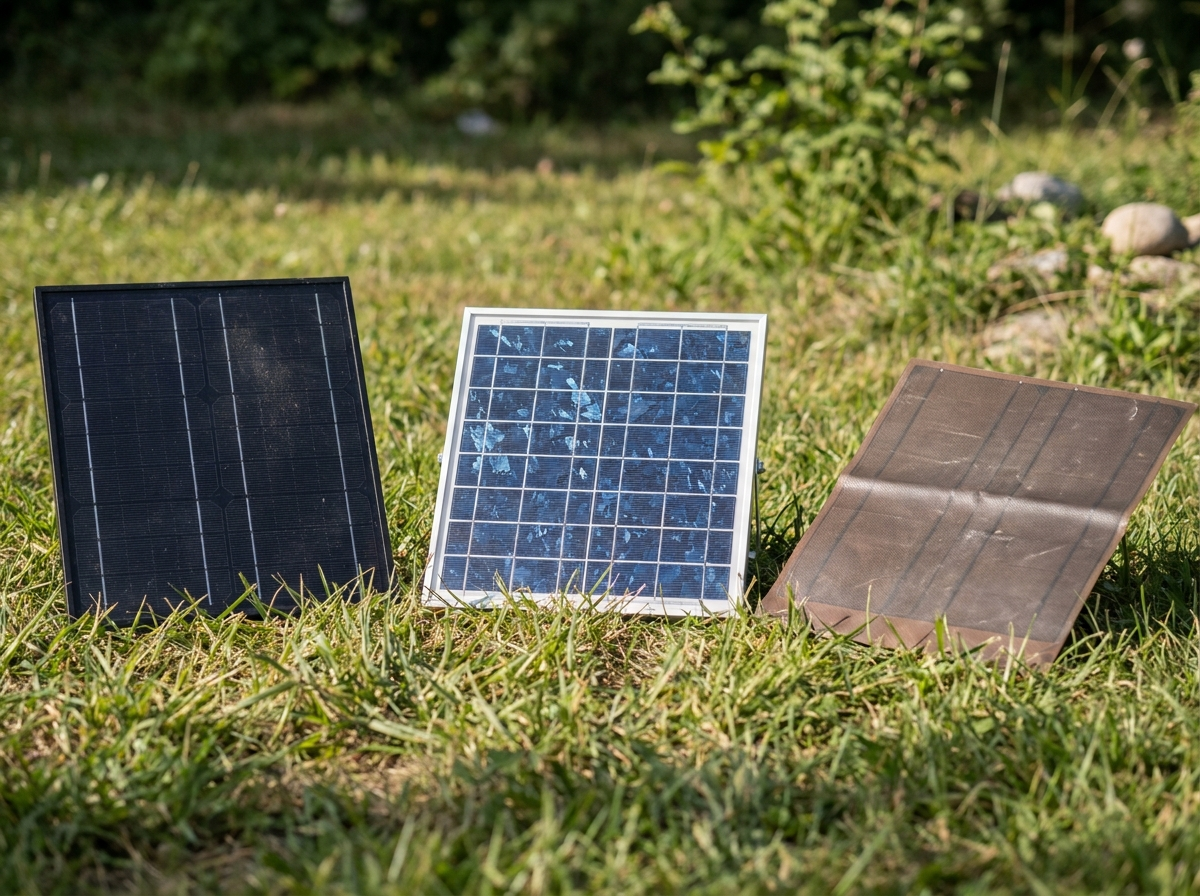
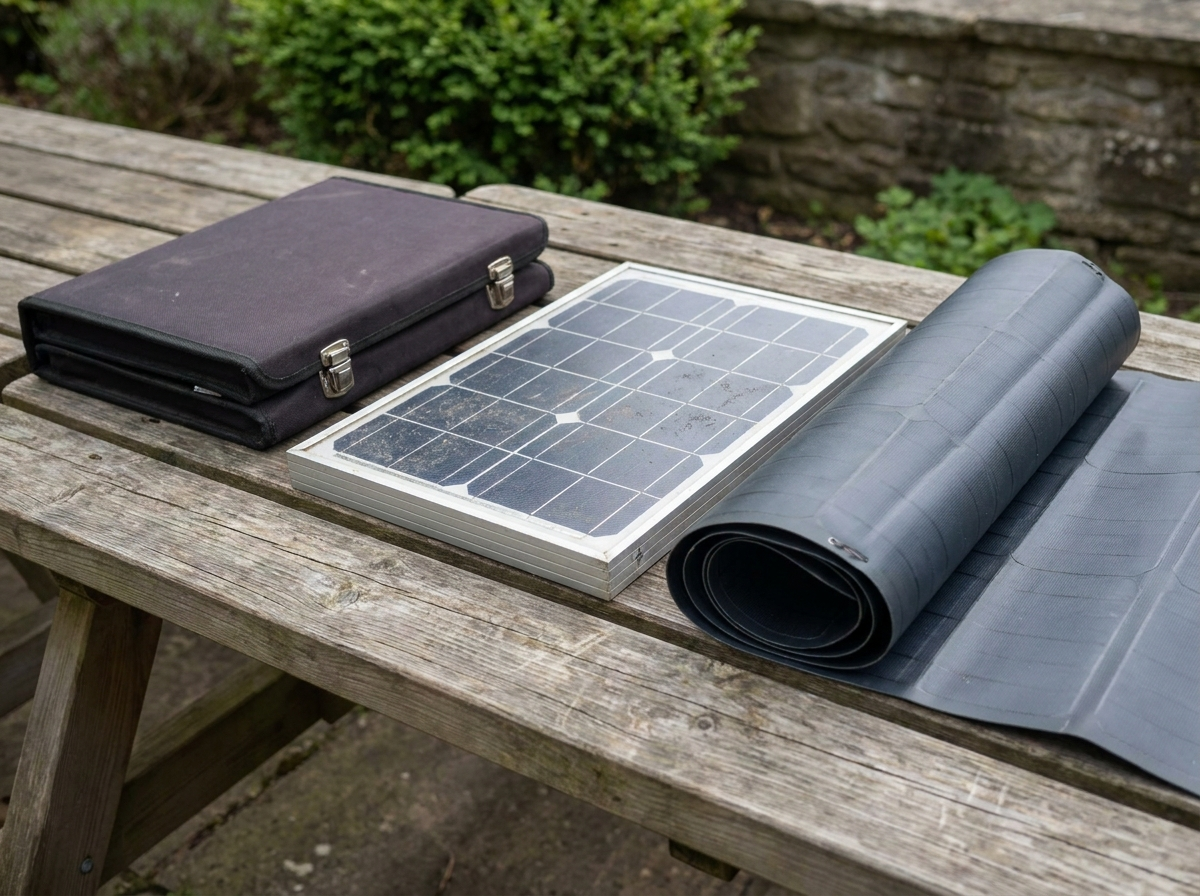
    Monocrystalline vs. polycrystalline: Monocrystalline panels are more efficient per square foot, which matters a lot when your roof isn’t large. They also perform better in partial shade and high heat—both common conditions on the road. Polycrystalline panels cost less but require more surface area for the same output. For most RVers, monocrystalline is the practical choice despite the higher upfront cost.

    Rigid vs. flexible: Rigid panels mounted on aluminum frames are more durable and have better long-term performance. Flexible panels can conform to curved roofs, but they run hotter (which reduces efficiency and lifespan) and adhesive mounting creates real problems over time. Use flexible panels where rigid truly won’t fit—not as a default.

    Sizing your array: A common mistake is calculating wattage based on peak solar hours and assuming consistent output. In practice, shading, panel angle, temperature derating, and controller efficiency all reduce real-world yield. A conservative planning assumption is that you’ll harvest 70–80% of your panel’s rated wattage during usable daylight hours, averaged across the day. Run your math from there.

    Charge Controllers

    The charge controller sits between your panels and your battery bank. Its job is to regulate the voltage and current coming from the panels so the batteries charge properly without being overcharged or damaged.

    There are two types: PWM (pulse-width modulation) and MPPT (maximum power point tracking).

    PWM controllers are simple and inexpensive. They work fine in small systems where panel voltage closely matches battery voltage. In most serious RV setups, they’re not the right tool.

    MPPT controllers are more sophisticated. They continuously find the optimal operating point of the solar array and convert excess voltage into additional current—effectively squeezing more usable power out of your panels, particularly in cool weather and during morning and evening hours. The efficiency gain over PWM can be 20–30% in real-world conditions. For anything beyond a bare-minimum setup, an MPPT controller is worth the cost difference.

    What to look for: Match the controller’s maximum input voltage to your panel configuration, ensure the amperage rating has headroom above your calculated array output, and check that it supports the battery chemistry you’re using—especially important with lithium batteries, which require a different charging profile than lead-acid.

    Battery Banks

    This is where most of your system’s cost lives, and it’s the decision with the longest-lasting consequences.

    Lead-acid (AGM or flooded): Still in widespread use, and for good reason—lower upfront cost. But usable capacity is roughly 50% of rated capacity (discharging deeper damages them), they’re heavy, and they need periodic maintenance if flooded. For stationary backup use, they’re reasonable. For mobile RV use where weight and space matter, they’re increasingly hard to justify.

    Lithium iron phosphate (LiFePO4): The dominant chemistry for serious RV solar setups. Usable capacity is around 80–90% of rated capacity. They’re lighter, have a longer cycle life (often 2,000–4,000+ cycles vs. 300–500 for AGM), charge faster, and maintain stable voltage under load. The upfront cost is higher, but the cost per usable kilowatt-hour over the battery’s life often favors lithium.

    Capacity planning: Calculate your daily amp-hour draw realistically. Add up every device you run—refrigerator (often the biggest load), lights, fans, phone and laptop charging, water pump, any entertainment electronics. Then build in a buffer. Undersizing your battery bank is the most common reason RV solar systems disappoint people.

    Inverters

    Your panels, controller, and batteries all operate on DC power. Most of your appliances run on AC. The inverter bridges that gap.

    Pure sine wave vs. modified sine wave: Use pure sine wave. Modified sine wave inverters are cheaper, but they can damage sensitive electronics, cause motors to run hot, and produce audible hum in audio equipment. The price difference has narrowed enough that there’s no good reason to buy modified sine wave for an RV system.

    Sizing: Inverter capacity needs to handle your peak load—not just your average draw. An air fryer, microwave, or hair dryer can pull 1,000–1,800 watts in a burst. Add up the wattage of devices you might run simultaneously and size your inverter to handle that comfortably.

    Inverter-chargers: These combined units add shore power or generator charging capability alongside the inversion function. For full-timers who occasionally plug in at campgrounds, this integration simplifies the system and reduces wiring complexity.

    Additional RV Solar Products Worth Understanding

    Battery Monitors

    A battery monitor is not optional—it’s essential. Without one, you’re guessing at your state of charge, which leads to either underusing your battery (leaving power on the table) or overdischarging it (shortening its life). A proper shunt-based monitor measures actual current in and out of the battery bank and gives you a reliable state-of-charge reading.

    Solar Portable Power Stations

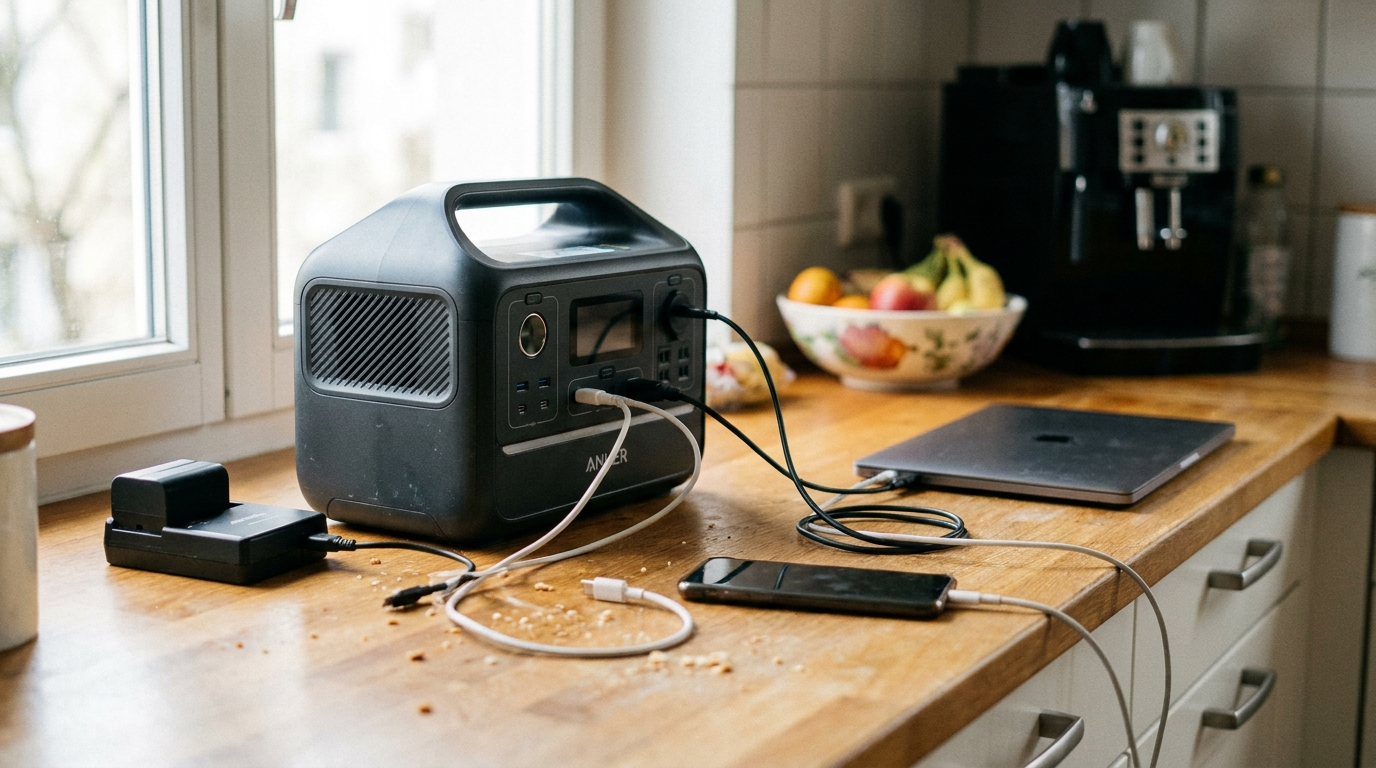
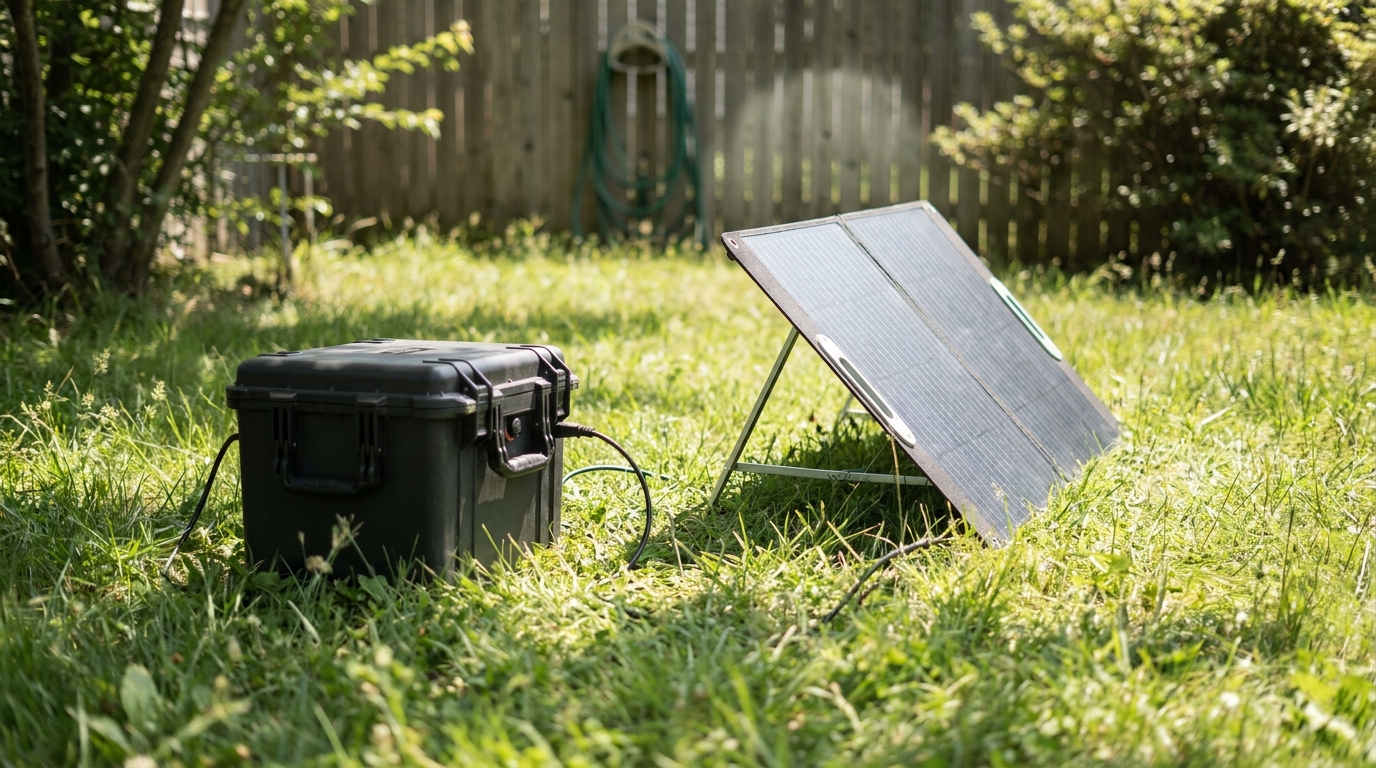
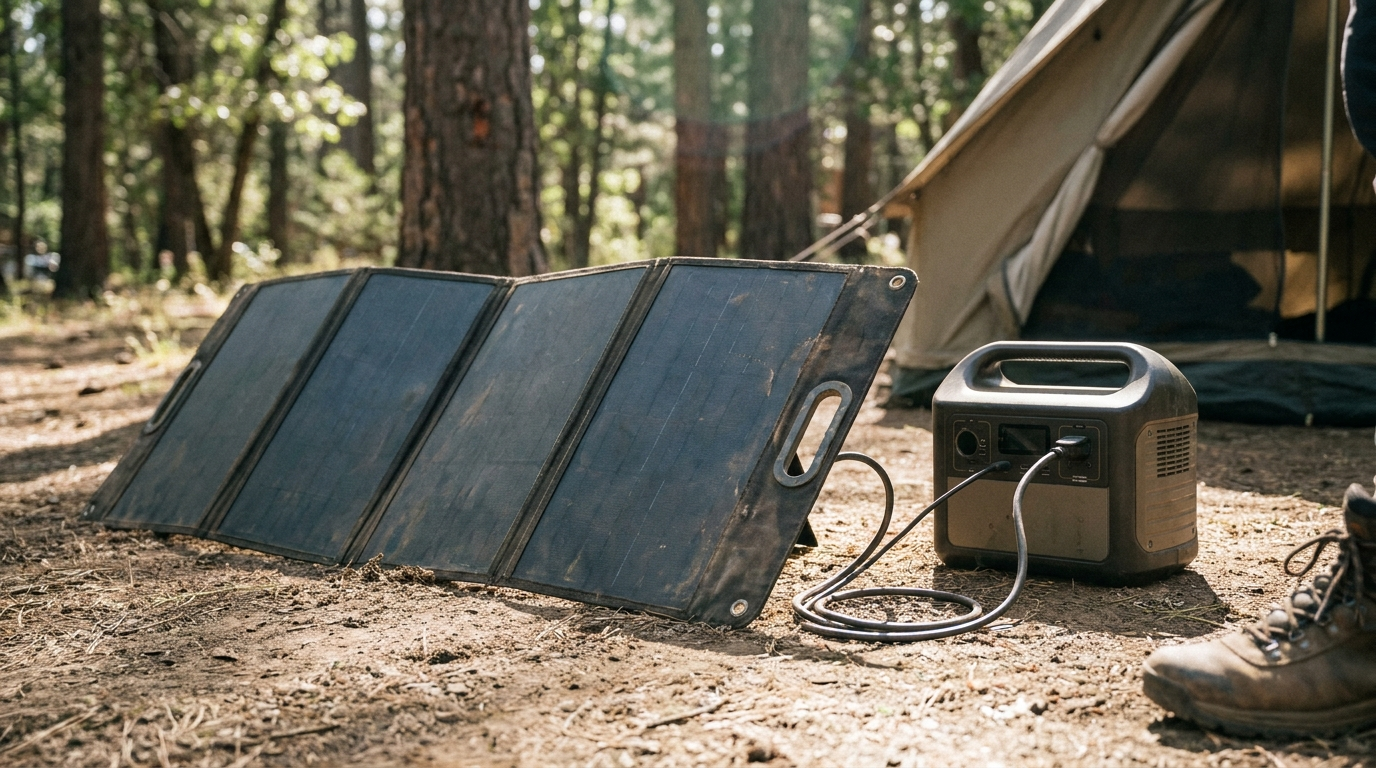
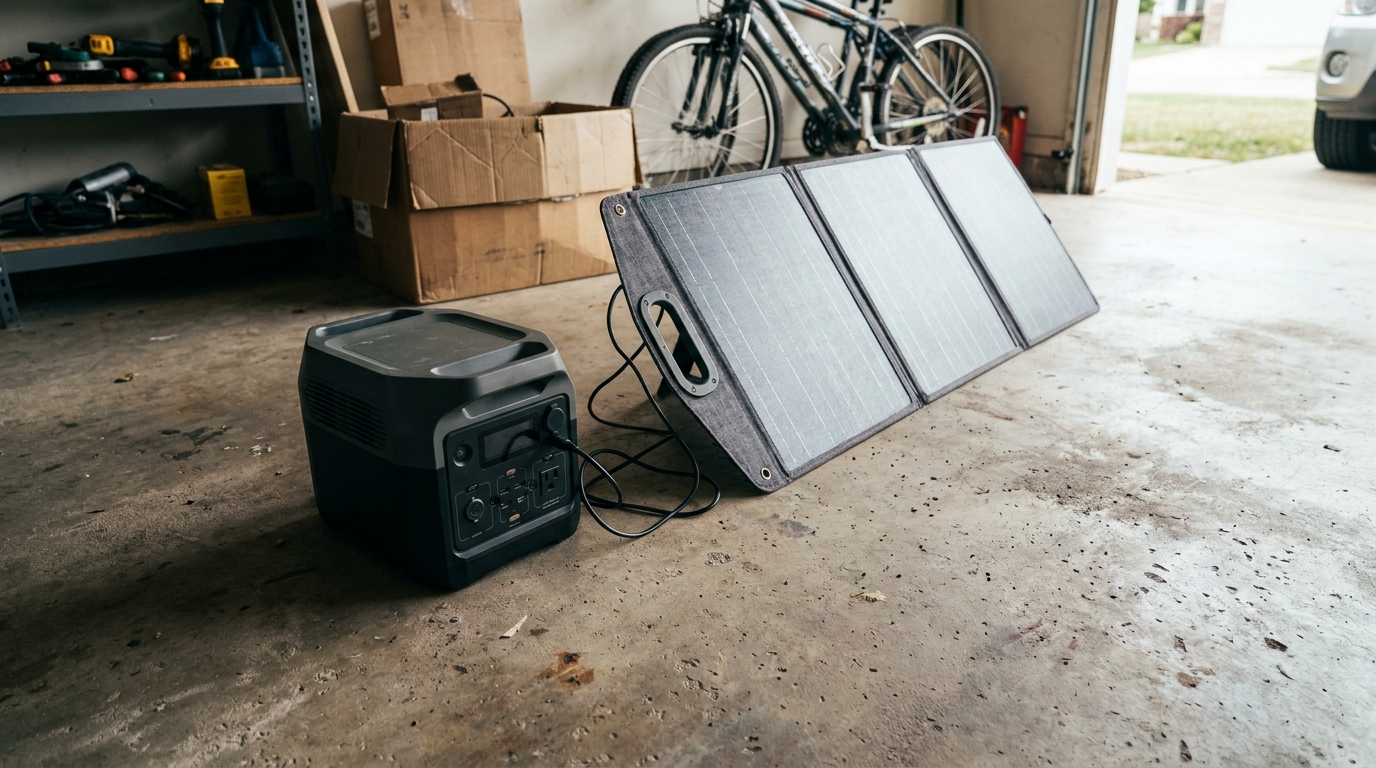
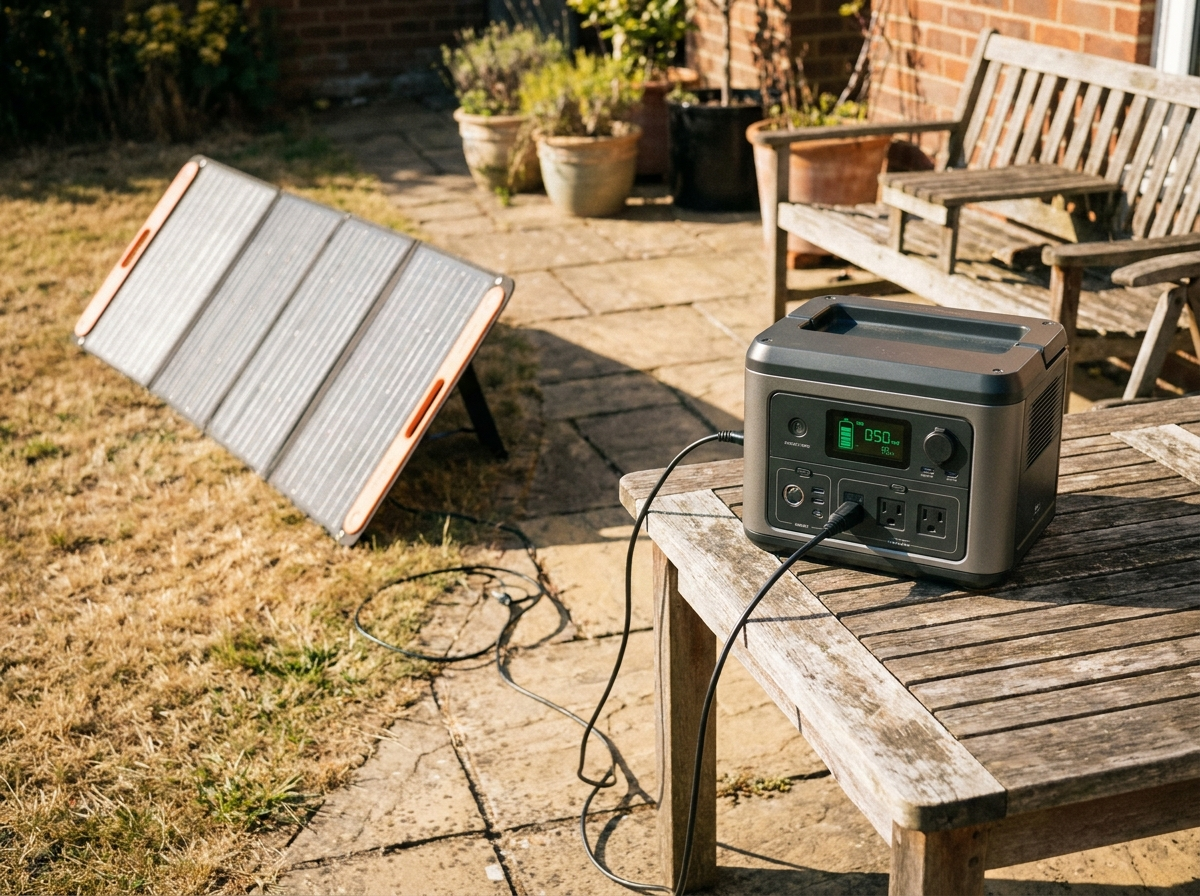
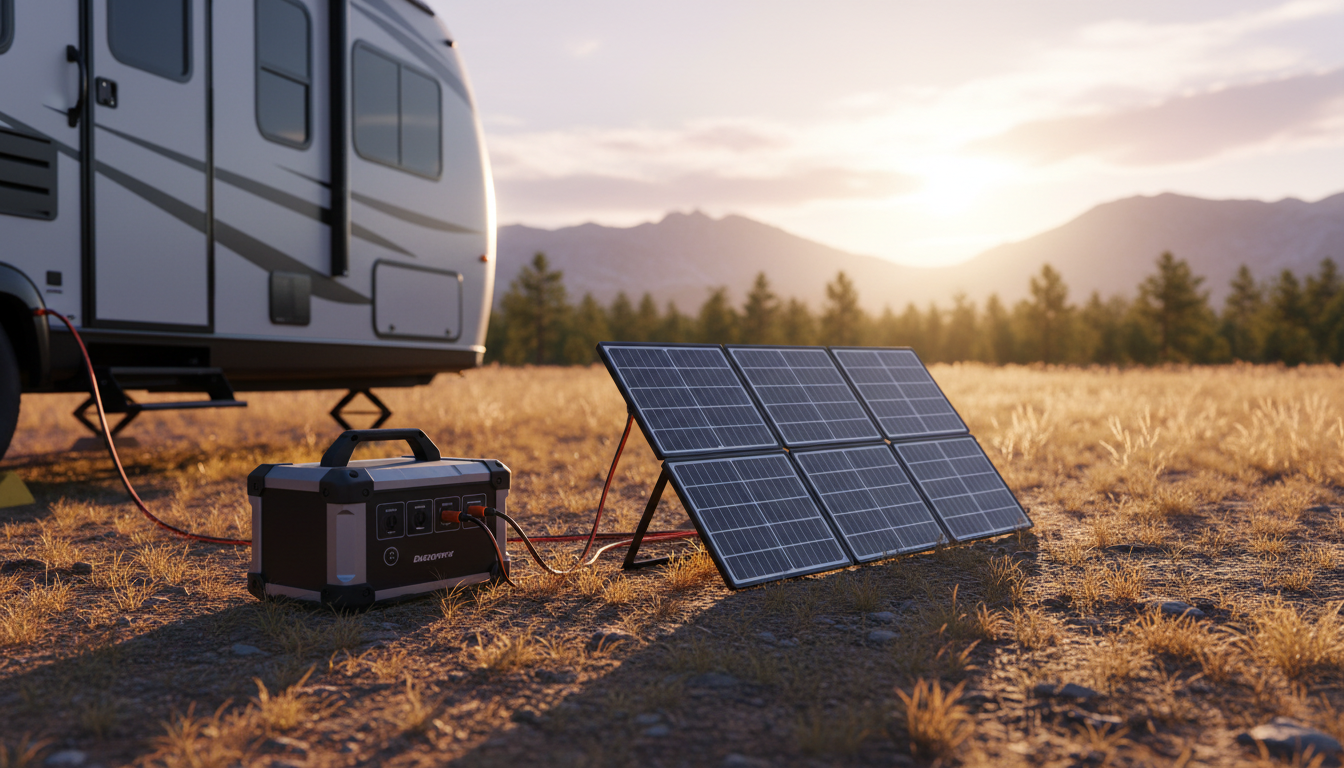
    All-in-one portable power stations combine a battery, inverter, and sometimes a charge controller in a single enclosable unit. They’re not a replacement for a roof-mounted system in most serious builds, but they fill a specific role well: weekend camping trips, supplemental power in a pinch, or situations where permanent installation isn’t practical (renters, newer rigs you don’t want to modify). Pair one with a portable folding solar panel and you have a genuinely useful standalone setup for lighter use cases.

    DC-DC Chargers

    Also called battery-to-battery chargers, these devices charge your house battery bank from your vehicle’s alternator while you drive. They’re particularly valuable for lithium systems, where the alternator’s output profile needs to be managed carefully to avoid overworking it. A quality DC-DC charger protects your alternator while ensuring your house batteries get a proper charge during transit.

    System Integration: The Part Most Guides Skip

    The biggest mistake people make with rv solar products isn’t choosing the wrong individual component—it’s failing to think about the system as a whole. Component compatibility matters:

    • Your charge controller’s charging profile must match your battery chemistry.
    • Wire gauge throughout the system must handle peak current without voltage drop or heat buildup.
    • Fuses and breakers must be appropriately sized and placed close to the battery.
    • If you’re running lithium batteries, a battery management system (BMS) is essential—most quality lithium batteries have one built in, but verify before purchasing.

    A professional RV electrical installer can review your component list before you buy anything. That one-hour consultation often saves significant money and headaches. If you’re doing it yourself, detailed wiring diagrams and load calculations should be done before ordering—not after.

    How Much Solar Is Enough?

    Honest answer: it depends on how you camp. Full hookup campers at RV parks don’t need rooftop solar at all. Weekend boondockers can often get by with 200–400 watts and a modest battery bank. Full-time off-grid travelers with a compressor refrigerator, regular laptop use, and evening lighting often need 600 watts or more paired with a substantial battery bank.

    Map your actual usage first. Then build your system to match that—not to impress fellow campers. The best rv solar products are the ones sized correctly for how you actually live, not the biggest or most expensive options available.

    The goal is reliable power that you stop thinking about. Get the system right and it disappears into the background—which is exactly where it belongs.

  • Anker Solar Panels: How They Work and What to Expect

    Anker Solar Panels: How They Work and What to Expect

    What Anker Solar Panels Actually Are

    Disclosure: This article contains affiliate links, which means we may earn a commission if you purchase through them, at no extra cost to you.

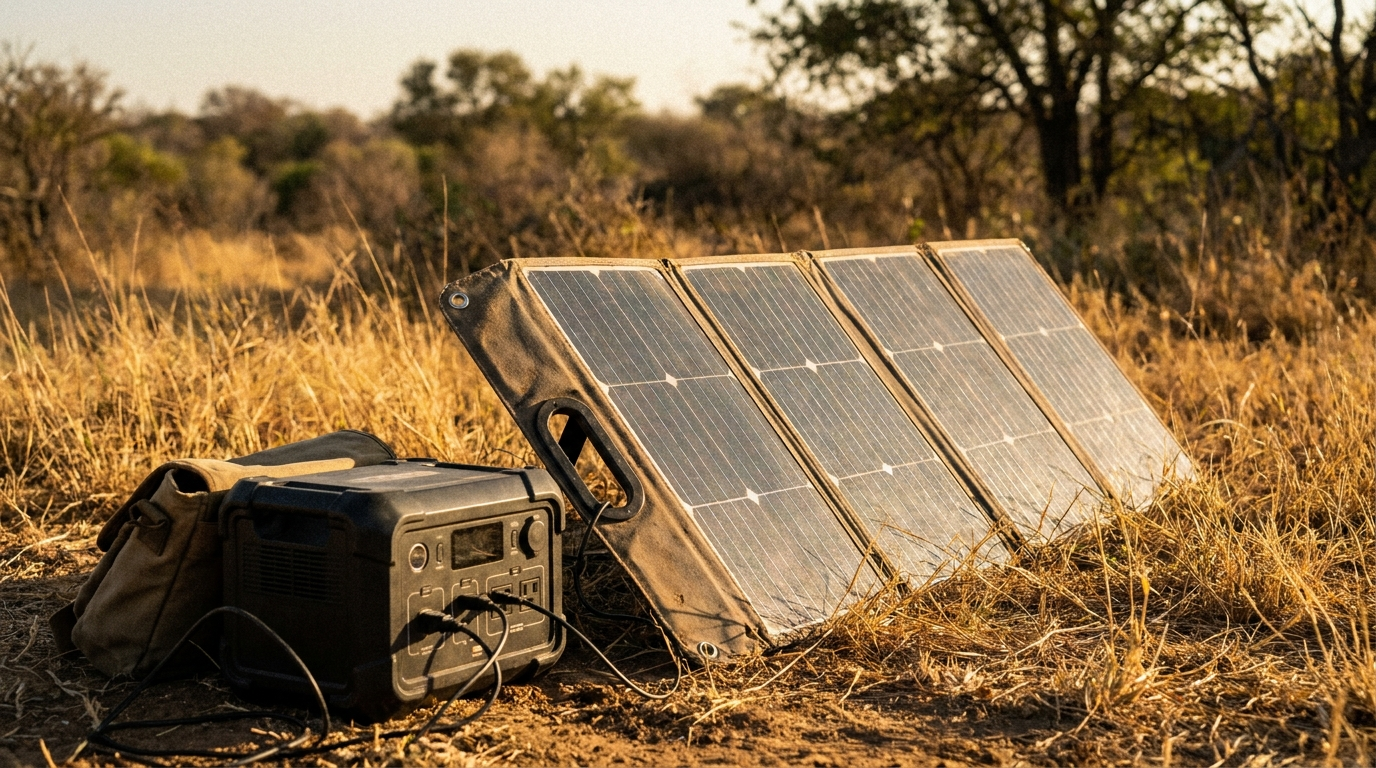
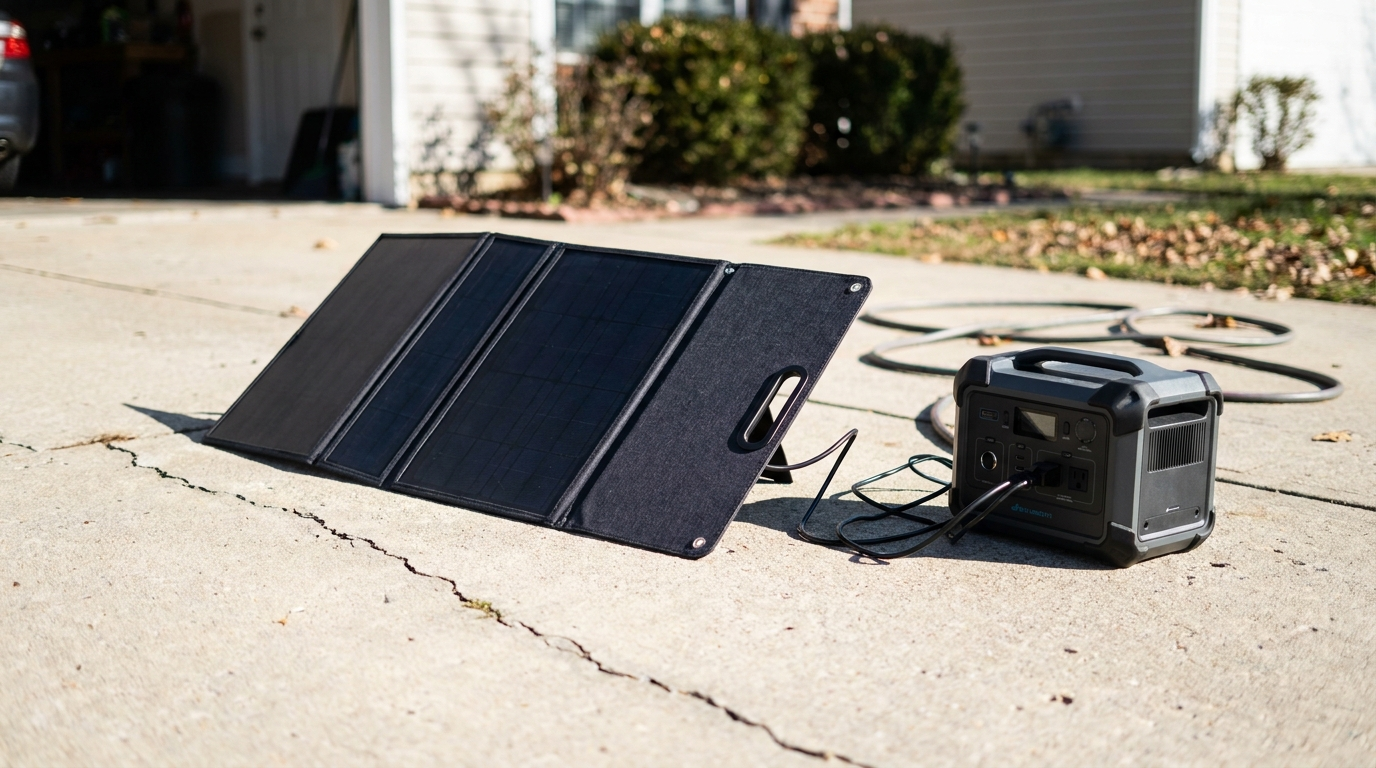
    Anker solar panels sit in a specific category: portable, foldable panels designed to pair with portable power stations rather than replace a rooftop installation. That distinction matters more than most product pages let on. If you’re expecting to run a refrigerator indefinitely or cover a house’s baseload, these aren’t that. But if you want to recharge a battery pack while camping, keep a balcony power setup topped off, or build a compact emergency system — this is exactly the right tool.

    The lineup spans from compact panels suited for phone-and-light charging all the way up to larger foldable units capable of meaningful power generation. Most use monocrystalline silicon cells, which is the right call for portable use: higher efficiency per square inch means a smaller, lighter panel that still produces useful wattage.


    Efficiency: What the Numbers Mean in Practice

    Anker solar panels advertise efficiency ratings that sound impressive on spec sheets. Here’s how to read those numbers honestly.

    Panel efficiency tells you how much of the sunlight hitting the surface actually becomes electricity. A panel rated at 23% efficiency converts 23% of incoming solar energy — the rest is lost as heat or reflection. For portable panels, anything above 20% is genuinely good. It means the panel can be physically smaller while still hitting its wattage target.

    But rated wattage assumes Standard Test Conditions: 1,000 watts of solar irradiance per square meter, a cell temperature of 25°C, and a specific light spectrum. You’ll almost never hit those conditions outdoors.

    In real use:
    Direct midday sun in summer: you might reach 80–90% of rated output
    Partly cloudy days: expect 40–60%, sometimes less
    Morning or late afternoon: the angle drops output significantly
    Hot days: cell temperature rises, and efficiency drops — sometimes by several percent

    A 100W panel on a hazy afternoon through a dirty cell surface might give you 50–60W. That’s not a flaw; it’s physics. Plan your system around realistic output, not peak ratings.


    The MPPT and MC4 Questions

    Two specs come up constantly with anker solar panels, and both are worth understanding before you connect anything.

    MPPT vs PWM Charge Controllers

    Most portable power stations use Maximum Power Point Tracking (MPPT) charge controllers internally. MPPT extracts the most power possible from a panel across varying light conditions — it constantly adjusts the electrical load to stay at the panel’s most productive operating point. This is why pairing a quality solar panel with a cheap PWM-only charge controller throws away efficiency unnecessarily.

    If you’re using anker solar panels with a compatible portable power station, the MPPT is handled for you inside the station. Just plug in and monitor output.

    Connectors and Compatibility

    Portable foldable panels typically use one of two connector types: MC4 (the industry standard for outdoor solar) or proprietary barrel-style connectors. Anker panels generally ship with adapters for multiple connection types, but always verify your power station’s input connector before assuming it’s plug-and-play.

    Paralleling two panels to double output is possible — but only when the voltage and current specs are within your power station’s input limits. Stacking wattage beyond what the charge controller can handle doesn’t speed up charging; it wastes the excess.


    Daisy-Chaining and Expandability

    One practical advantage of anker solar panels is support for chaining multiple units together. You can connect several panels in parallel to increase current (amps) while keeping voltage the same — useful if your power station accepts high amperage at a fixed voltage.

    Series wiring increases voltage, which some stations handle better than others. Read your power station’s solar input spec carefully:
    Maximum input voltage: never exceed this; it can damage the charge controller
    Maximum input wattage: the hard ceiling on what the station will accept
    Recommended voltage range: the sweet spot for efficient charging

    For most portable power station setups, parallel wiring of two or three panels is the practical limit before you hit the station’s wattage ceiling anyway.


    Real-World Use Cases That Actually Work Well

    Overlanding and Van Life

    Foldable panels that lay flat on a roof rack or fold out at a campsite are a natural fit here. The compactness matters when storage space is tight. A pair of well-positioned panels can meaningfully offset how often you need shore power or generator time — not eliminate it, but reduce it significantly on sunny days.

    Balcony Power Systems

    This use case has grown fast in Europe and is catching on elsewhere. A foldable panel angled against a railing feeds a small battery, which then powers lights, a fan, or keeps devices charged. It’s not grid-scale production, but it’s real and measurable offset.

    Emergency Preparedness

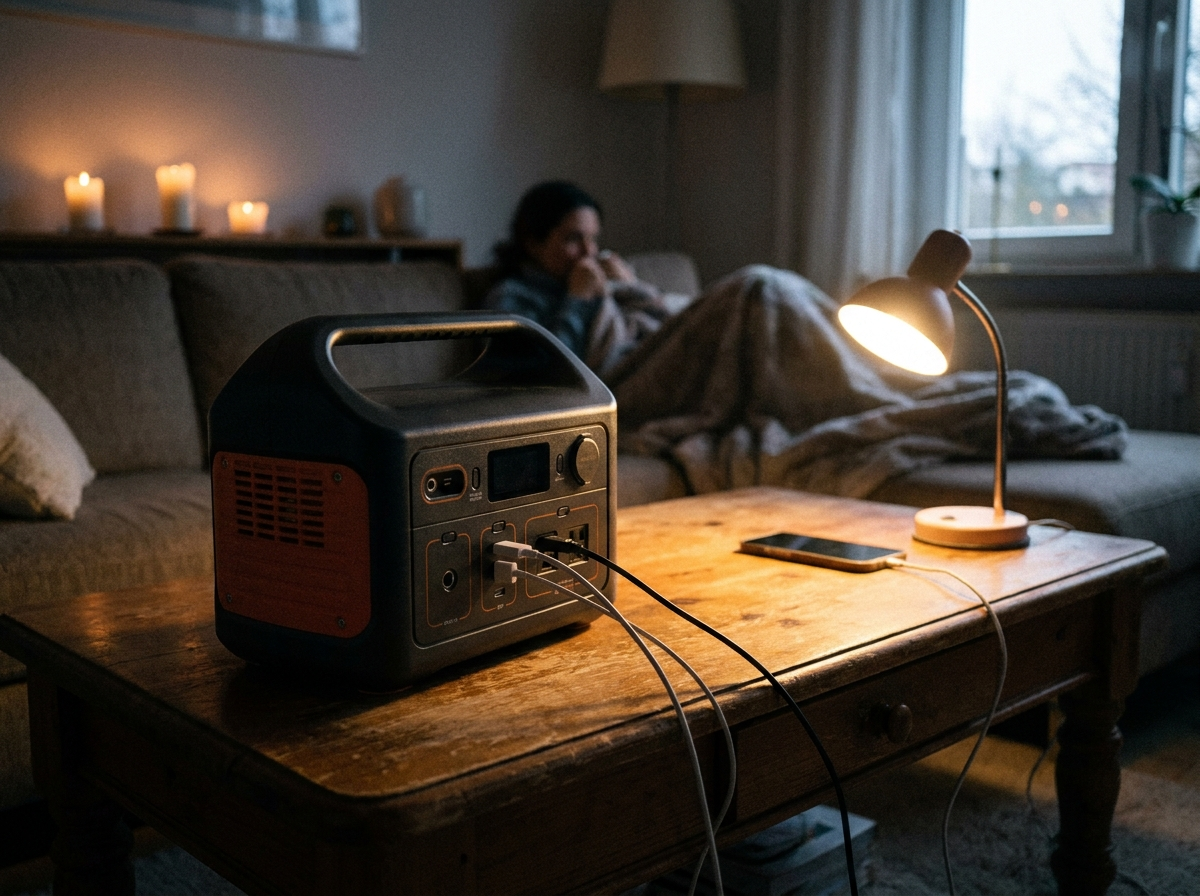
    A solar panel stored flat in a closet doesn’t degrade meaningfully over years. When grid power goes out for days — after a storm, during an extended outage — a panel and a charged battery station is a genuinely useful combination. Anker solar panels with a large-capacity portable power station can handle phone charging, small appliances, a CPAP machine, and lighting for multiple days if managed carefully.

    Base Camping

    Car camping or base camping where the panel sits stationary for hours is probably the best-case scenario for output. Set it up, angle it properly, and let it run while you hike. Come back to a topped-off battery. This is where the wattage ratings come closest to real-world results.


    Getting Maximum Output: Positioning Matters More Than You Think

    Panel angle and orientation have a larger effect on output than most people expect until they test it.

    • Aim for perpendicular to the sun: the panel should face the sun directly, not at an angle. Even a 30° tilt away from optimal can cut output noticeably.
    • Avoid partial shade: a single shaded cell can drag down the whole panel’s output disproportionately because of how cells connect in series strings.
    • Keep cells clean: dust, bird droppings, and fingerprints reduce output. A quick wipe with a damp cloth before a charging session makes a real difference.
    • Reposition through the day: the sun moves. A panel optimally angled at 10am is losing output by 2pm if you haven’t adjusted it. Even one mid-day repositioning adds meaningful energy.

    Durability and Long-Term Use

    Portable solar panels take physical abuse that rooftop panels never face: folding, unfolding, being packed and unpacked, rained on, and left in hot car trunks. The weak points are almost always the cables and connectors, not the cells themselves.

    Inspect connector ends periodically. Any corrosion or physical damage to the connector is worth addressing early — a damaged connector causes resistance, which causes heat, which reduces output and can eventually cause failure.

    The cells inside anker solar panels are rated for a substantial lifespan, with gradual efficiency degradation over years. Portable use is gentler on cells than harsh rooftop UV exposure, but rougher on everything mechanical. Treat the cables with care and the panels will outlast most other gear in your kit.


    What Anker’s Solar Lineup Doesn’t Cover

    Be clear-eyed about the category limits. Anker solar panels are not designed for:
    – Permanent roof mounting
    – Grid-tied systems
    – High-voltage string installations
    – Powering heavy appliances directly without a battery buffer

    For those applications, the right tool is a different category entirely — fixed rigid panels, an inverter, and a proper charge controller.

    For portable, flexible, go-anywhere solar that pairs with modern battery storage, the ecosystem is well-designed and the components genuinely work together. Understanding exactly what you’re working with — the efficiency realities, the connector specs, the positioning discipline required — is what separates a frustrating experience from one that reliably delivers.

  • Firman Tri Fuel Generator: How It Works and Who Needs One

    Firman Tri Fuel Generator: How It Works and Who Needs One

    What a Firman Tri Fuel Generator Actually Does

    Disclosure: This site earns a small commission on qualifying purchases at no extra cost to you.

    A firman tri fuel generator is exactly what the name says — a generator engineered to run on three separate fuel sources: gasoline, liquid propane (LP), and natural gas (NG). You switch between them using a selector valve, and the carburetor or fuel system is tuned to handle all three without a conversion kit. That’s the core idea, and it’s more useful than it sounds once you think through real emergency scenarios.

    Gasoline is the default. Most people start there because it’s familiar. But gasoline goes stale, it’s in short supply after major storms, and storing large quantities creates safety and regulatory headaches. Propane stores almost indefinitely and burns cleaner. Natural gas connects to your house line, which means you never run out as long as the utility is running. Each fuel has a specific window where it’s the right call. A tri-fuel machine lets you pick that window instead of being locked in.

    How the Fuel Switching System Works

    The mechanics are straightforward. There’s a fuel selector dial — typically labeled GAS, LPG, and NG — that controls which fuel pathway is open. The carburetor on a tri-fuel unit is designed with jets and passages sized to accommodate the different energy densities of each fuel. Gasoline has the highest energy content per unit volume, propane is somewhat lower, and natural gas lower still. Because of this, you’ll see a rated wattage drop when you move away from gasoline.

    For example, a unit might produce its full rated peak wattage on gasoline, but drop to perhaps 85-90% on propane and lower still on natural gas. The exact figures vary by model, and you should check the spec sheet for whichever unit you’re looking at. The point is: this is normal and expected. It’s not a defect.

    Natural gas mode requires a dedicated hose connection to a gas line or portable tank fitting. You’ll need the right fittings and a compatible regulator — some come included, some don’t. Propane mode typically uses a standard POL or QCC1 fitting compatible with common 20 lb and 100 lb tanks.

    The Real-World Advantage of Three Fuels

    Here’s where experience matters more than spec sheets.

    During a hurricane or ice storm, gas stations run dry within hours. Everyone with a gasoline-only generator is hunting for fuel or rationing what they have. If you’ve got a 100 lb propane tank sitting next to your grill — which a lot of households already do — you have a significant backup that most neighbors don’t. And if you have a home connected to a natural gas line that stays live (which it often does even when power is out), you have essentially unlimited runtime for as long as the utility infrastructure holds.

    That natural gas connection is underrated. People focus on propane because tanks are tangible and portable. But a generator running on the house natural gas line, powering a refrigerator and a window unit through a Southern summer outage, doesn’t need you to think about refueling at all. You just run it.

    Propane wins on storage. A sealed propane tank doesn’t degrade over years the way gasoline does. If you’re prepping for infrequent emergencies and don’t want to rotate fuel stock, filling a couple of propane cylinders and leaving them in the shed is a genuinely low-maintenance approach.

    Gasoline still makes sense when you need maximum output and runtime efficiency, or when you’re already carrying gas for other equipment.

    Maintenance Differences Across Fuels

    Gasoline is hardest on the engine over time. It leaves varnish deposits if left sitting in the carburetor, which is why the standard advice is to run the carb dry before storage. Propane and natural gas burn much cleaner — less carbon buildup, fewer carb cleaning sessions, longer time between oil changes in some cases.

    That said, running on natural gas or propane doesn’t mean you skip maintenance. Oil changes still happen on schedule (check the manual — hours-based intervals are standard). Air filters still clog. Spark plugs still wear. The difference is that fuel-system maintenance becomes less frequent and less fussy.

    One practical note: if you’ve been running gasoline and want to switch to propane for storage season, run the tank low, switch the selector to propane, and let it burn through the remaining gasoline in the lines before shutting down. Cleaner handoff, less gunk sitting in the system.

    Natural Gas Connection: What You Need to Know

    Connecting to a home natural gas line isn’t plug-and-play. The generator needs to be positioned close enough to the line, you’ll need a properly rated flexible gas hose (not all hoses are appropriate for generator use), and the connection should comply with local codes. In many jurisdictions, a licensed plumber or gas fitter needs to make or inspect the connection.

    Pressure matters too. Home natural gas systems run at low pressure, and your generator needs to be compatible with that pressure range. Most tri-fuel generators designed for residential use are, but confirm before assuming.

    If you’re running long hours on natural gas — say, several days during an extended outage — the fuel savings compared to gasoline or propane can be significant, and the convenience factor is hard to overstate.

    Noise, Size, and Placement Considerations

    A firman tri fuel generator in the conventional open-frame configuration is not quiet. These are not inverter generators (though inverter models with multi-fuel capability do exist separately). Expect operational noise levels that require you to keep the unit well away from windows and sleeping areas.

    Placement also matters for fuel connections. If you’re running a natural gas line, the generator needs a semi-permanent spot. If you’re using propane tanks, you want to keep them away from the exhaust. Carbon monoxide from any generator is deadly — this isn’t abstract. These units run outdoors only, minimum 20 feet from any door, window, or vent, full stop.

    Who Gets the Most Value From Tri-Fuel Capability

    Homeowners in hurricane or ice-storm country benefit most. The ability to pivot fuel sources when one becomes unavailable is genuinely useful, not a marketing feature.

    People with existing propane infrastructure — already using propane for heating, cooking, or an auxiliary tank — have a natural fit. They’re not adding a new fuel type to manage; they’re extending what they already have.

    Small farms or rural properties on natural gas also make strong candidates. A generator on the house line covers extended outages without requiring any logistics.

    If you’re in a mild climate with rare outages and you have easy access to gasoline, the tri-fuel premium may not be worth it. A reliable single-fuel inverter generator might serve you better.

    Running Costs by Fuel Type

    Fuel costs shift constantly, but the relative picture is fairly stable. Natural gas is typically the cheapest per kilowatt-hour generated. Propane sits in the middle. Gasoline is usually most expensive and most volatile in price. The trade-off is that natural gas requires infrastructure investment upfront, and propane requires tank management. Gasoline requires neither, which is why it’s the default despite the cost.

    If you run your generator frequently — during seasonal outages, for job sites, or as part of a regular off-grid setup — those per-hour cost differences add up meaningfully over a year.

    One Underrated Feature: Peace of Mind During Prolonged Outages

    After day two of a power outage, fuel anxiety becomes a real psychological burden. People make bad decisions — driving long distances to find gas, overfilling containers, running generators unsafely close to homes. Having propane or natural gas as a fallback removes that pressure entirely. You already have fuel. You can focus on other things.

    That’s not a small thing. It’s one of the most practical arguments for tri-fuel capability, and it rarely shows up in spec comparisons.

  • Solar Phone Charger: How It Works and What to Expect

    Solar Phone Charger: How It Works and What to Expect

    Solar Phone Charger: How It Works and What to Expect

    Disclosure: This site may earn a small commission from links in this article, at no extra cost to you.

    A solar phone charger sounds simple — point a panel at the sun, plug in your phone, done. In practice, it’s a bit more nuanced than that, and understanding the nuances saves you from real frustration. I’ve used solar panels in the field for years, from weekend camping trips to longer off-grid stretches, and the questions I hear most often come down to the same core confusion: why is my phone charging so slowly, why did it stop, and is this thing actually worth it?

    This article answers all of that properly.


    What a Solar Phone Charger Actually Is

    The phrase covers two very different products, and mixing them up is where most people go wrong.

    Direct-charging panels — typically foldable, anywhere from 5W to 21W or so — output USB power directly from the solar cells. Plug your phone straight in. No battery inside the panel itself.

    Solar chargers with a built-in battery — often called solar power banks — have a small lithium battery inside. The panel charges the battery, and the battery charges your phone. Much slower to solar-charge, but the battery acts as a buffer.

    These work completely differently in practice. Knowing which one you have (or want) changes how you use it.


    How Direct Solar Charging Works — and Why It’s Inconsistent

    solar phone charger

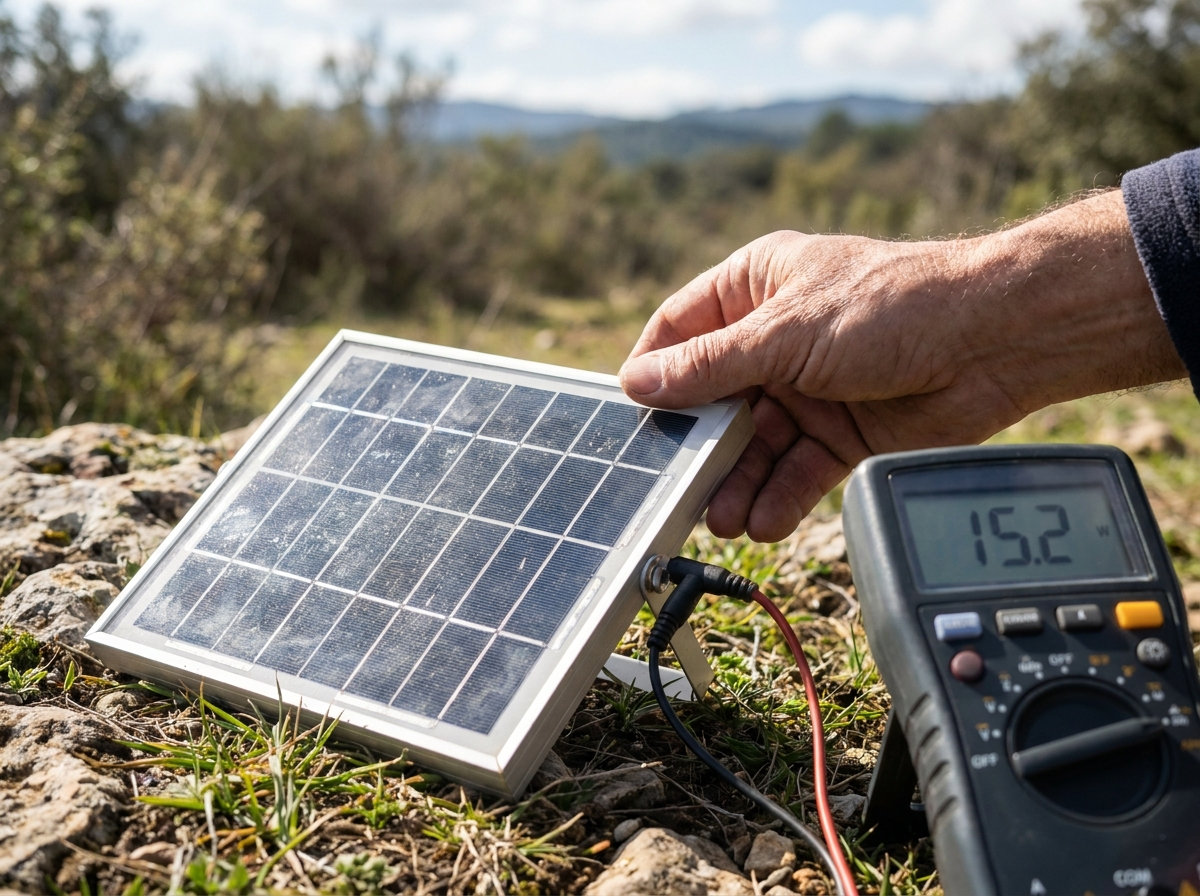
    Solar panels produce power proportional to the light hitting them. A 15W panel in direct noon sun in July might actually deliver 10–12W to your phone after conversion losses. That same panel under thin cloud cover might drop to 3W. A shadow crossing it? Output can tank to near zero in seconds.

    Here’s the problem: most phones don’t like that variability. Voltage and current fluctuations can cause your phone to repeatedly connect and disconnect from the charger, barely making progress. Some phones handle it gracefully. Others don’t.

    Better portable solar panels address this with a technology called Maximum Power Point Tracking (MPPT) or, on simpler panels, a capacitor or small internal buffer that smooths out the output. If a panel explicitly mentions stable output or has an MPPT controller built into its USB port circuitry, it handles clouds and shifting shade much better.

    Without that stabilization, a direct-charging panel works best in strong, steady, unobstructed sunlight. That’s a real constraint.


    Charging Speed: What’s Realistic

    solar phone charger

    A modern smartphone battery holds roughly 15–20Wh of energy. A 10W solar panel in good sun puts out maybe 7–8W of usable power after efficiency losses.

    Do the math: under ideal conditions, that’s roughly 2–3 hours to charge a phone from flat. Under real-world conditions — some cloud, non-perfect panel angle, cable losses — budget 3–5 hours for a full charge from a small panel.

    Smaller panels (5W and under) are honest enough in their limitations. They’re fine for topping up a phone during a long hiking day where you clip the panel to your pack and your phone is just ticking along. Don’t expect them to recover a dead phone in an hour.

    For context, a 5W panel in decent sun delivers about 300–400mAh into your phone per hour. Most phones have batteries between 3,000–5,000mAh. That’s a slow trickle, not a fast charge.


    Solar Power Banks: The Trade-Offs

    solar phone charger

    A solar power bank with a small built-in panel (usually 1–3W) is one of the most misunderstood products in this space. People assume the solar panel is a meaningful charging source. It isn’t, really.

    That 1W panel, in perfect sun, generates about 1Wh per hour. Most of these power banks hold 10,000–20,000mAh (37–74Wh). You’d need days of direct sun to charge the battery from empty via solar alone.

    The solar panel on a power bank is best understood as a trickle maintenance feature — useful for offsetting self-discharge during storage, or slowly adding charge during a long outdoor day. It’s not a primary charging method.

    If you want solar to genuinely charge a battery bank, you need a proper panel (10W minimum, realistically 20W+) paired with a separate power bank or portable power station.


    When a Panel Alone Is Enough — and When It Isn’t

    A direct-charging solar panel without any battery storage works well when:

    • You have reliable sun for several hours
    • You can leave your phone plugged in and stationary (not in your pocket)
    • You’re charging during the day and using the phone at night
    • You’re topping up, not recovering from flat

    It gets frustrating when:

    • You’re in variable weather or partial shade
    • You need your phone charged and ready quickly
    • You’re moving — hiking, cycling — and can’t keep the panel optimally angled
    • You need to charge at night

    For those latter situations, a small portable power station or a quality power bank charged by a separate solar panel is a significantly more reliable setup. The panel charges the battery during the day; you charge your phone from the battery whenever you need it. The buffer completely eliminates the variability problem.


    Panel Wattage: How Much Do You Actually Need?

    For charging a phone only:

    • 5W: Fine for slow top-ups during a day hike, but marginal for a full charge in reasonable time.
    • 10W: The practical minimum for reliably charging a phone from flat within a day.
    • 15–21W: Hits a sweet spot — charges a phone comfortably and can also charge small power banks or other devices simultaneously.
    • 40W+: Overkill for just a phone, but makes sense if you’re also running a tablet, camera batteries, or small power station.

    Panel efficiency matters too. Monocrystalline panels (the dominant type now) outperform polycrystalline in low-light and high-temperature conditions. Most decent portable panels today are monocrystalline, but it’s worth checking the spec sheet.


    Practical Tips From Actual Use

    Angle matters more than people think. A panel lying flat loses a significant percentage of output compared to one angled perpendicular to the sun. On a clear day, re-angling every couple of hours makes a measurable difference.

    Heat reduces output. Counterintuitively, very hot surfaces hurt solar performance. A panel lying on hot black asphalt in summer sun will underperform the same panel propped up with airflow underneath it. This is why folding panels are often mounted on backpacks rather than laid flat — airflow helps.

    USB-C with Power Delivery. If your phone supports USB-C PD fast charging, check whether the panel’s USB-C port supports it. Many budget panels output 5V/2A max regardless of the port type. A panel that actually supports 18W or 30W PD output will charge compatible phones noticeably faster and can handle tablets and laptops too.

    Check your cable. A degraded cable or a charging-only cable (no data wires) can silently limit your charging current. When troubleshooting slow solar charging, the cable is always worth swapping out first.


    The Honest Bottom Line

    A solar phone charger is genuinely useful in the right context — it’s not a gimmick. But it works best when you understand what it can and can’t do. A decent 15W+ foldable panel in good sun will charge your phone reliably over a few hours. A tiny panel on a power bank will add a trickle, not a charge.

    For serious off-grid use, pair a real panel with a battery bank. That combination is far more practical than relying on direct solar charging, especially once the weather turns or the sun goes down.

    If you’re specifically trying to keep a phone alive during multi-day backcountry trips, a 10–15W folding panel plus a 10,000–20,000mAh power bank is the setup I’d recommend without hesitation. It covers both continuous daytime charging and on-demand nighttime power — and it fits in a side pocket.

  • EcoFlow Power Stations: What You Actually Need to Know

    EcoFlow Power Stations: What You Actually Need to Know

    EcoFlow Power Stations: What You Actually Need to Know

    Disclosure: This site may earn a commission from purchases made through links in this article.

    If you’ve spent more than ten minutes researching portable power stations, you’ve already run into ecoflows. The brand dominates the conversation — and mostly for good reason. But there’s a gap between the marketing and what actually matters when you’re trying to keep a CPAP running through a blackout or power a mini-fridge off-grid for a week. This guide closes that gap.

    What Makes EcoFlow Different (and Where It Falls Short)

    EcoFlow built its reputation on two things: charging speed and software polish. The Delta series introduced X-Stream fast charging years before most competitors took it seriously, and the companion app is genuinely one of the better ones in the industry — you can monitor wattage draw in real time, set charge limits to protect battery longevity, and schedule charging windows for time-of-use rate optimization.

    The trade-off? You’re paying for that ecosystem. EcoFlow units tend to cost more than comparable-capacity competitors, and some of their proprietary features — like smart generators and certain expansion batteries — only work within their own product family. That’s not a dealbreaker, but it matters if you’re building a system incrementally.

    One thing people underestimate: EcoFlow’s LFP (lithium iron phosphate) models hold up far better over hundreds of charge cycles than their older NMC-based units. If you’re buying for long-term home backup rather than occasional camping, make sure you’re looking at an LFP model.

    The Model Lineup, Honestly Assessed

    Delta 2 and Delta 2 Max

    The Delta 2 is the sweet spot for most people. It’s genuinely portable — not “portable if two people carry it” portable — and has enough output to run the appliances that actually matter during an outage: refrigerators, window AC units on lower settings, medical devices, power tools.

    The Delta 2 Max adds capacity and a higher AC output ceiling. If you run anything with a compressor or motor that surges on startup, the higher surge rating on the Max gives you more headroom. Running a chest freezer on a standard Delta 2 works, but you’ll want to verify your specific appliance’s startup draw. I’ve seen chest freezers with modest running wattages pull nearly triple that on startup.

    Both support expandable battery packs, which is one of ecoflows’ smartest design decisions — you’re not locked into a fixed capacity forever.

    Delta Pro and Delta Pro Ultra

    The Delta Pro is a serious home backup unit. With the right transfer switch or the EcoFlow smart home panel, it integrates into your home’s electrical system. The ultra model scales significantly higher — we’re talking whole-home partial backup territory, not just keeping the lights on.

    Be realistic about what you need here. The cost and weight jump substantially. If you need to power three or four critical circuits during an outage and you have solar panels on your roof, this tier makes sense. If you’re primarily a camper or want something for the car, you’d be over-buying massively.

    RIVER Series

    The RIVER 2 and RIVER 2 Pro are the entry-level lineup, and they’re genuinely capable for what they are. Don’t dismiss them. For van life, weekend camping, or a small desk setup, the RIVER 2 Pro in particular hits above its weight class. Fast charging gets it from near-empty to full surprisingly quickly, which matters more than raw capacity when you’re on the move and can top up regularly.

    The RIVER 2 Max adds expandable storage — same smart design philosophy as the Delta line, scaled down.

    Glacier and Wave: The Accessories

    EcoFlow has pushed into powered coolers and portable AC units. The Wave 2 portable AC is interesting for glamping or a worksite, but it draws heavily on any battery it’s connected to. Pairing it with a Delta 2 Max or Delta Pro is the realistic use case. Treating it as a standalone system for all-night cooling in a van is optimistic unless you have substantial solar input.

    Solar Charging: The Part Most Reviews Get Wrong

    The spec sheet says a Delta Pro can accept X watts of solar input. Great. In practice, hitting those numbers requires ideal conditions that rarely align — optimal panel angle, full sun, no partial shading, correct voltage and amperage matching.

    EcoFlow’s MPPT controllers are competent, but you’ll want to pair them with quality panels and size your array honestly. A common mistake: people buy one 200W panel thinking they’ll fully recharge a large unit in a few hours of sun. The math rarely works out that cleanly once you account for inefficiencies and real-world irradiance.

    For ecoflows paired with solar, the practical rule is to budget for more panel capacity than you think you need, and to think in terms of daily energy budgets rather than “how fast can I recharge from empty.”

    EcoFlow’s App and Smart Features: Useful, Not Gimmicky

    I’m skeptical of IoT features on power equipment generally — more things to go wrong, more privacy considerations. EcoFlow’s app is the exception where I’ll concede the utility.

    Real-time watt monitoring tells you exactly what your loads are drawing. The charge limit feature (set it to 80% for daily use, 100% before a storm) genuinely extends battery lifespan. Remote monitoring over WiFi or Bluetooth is legitimately useful when the unit is tucked in a closet and you want to check state of charge without walking over.

    That said: the unit functions fine without the app. You’re not dependent on their servers to use your battery. That matters.

    What to Watch Out For

    Fan noise. EcoFlow units aren’t silent under load. The fans kick on and run audibly when you’re pulling significant wattage or during fast charging. In a bedroom during a power outage, this is worth considering. Some people find it fine; others don’t. If you’re powering a CPAP in a quiet room, test your specific unit’s noise level under that load.

    AC output waveform. All current EcoFlow models use pure sine wave output, which is what you want for sensitive electronics and motor-driven appliances. Not an issue, but worth confirming if you’re looking at any older or heavily discounted unit.

    Warranty and support. EcoFlow’s warranty terms are reasonable, and their customer support has generally improved over the years. Keep your purchase receipt and register the unit. Battery degradation claims are where most warranty interactions happen — LFP chemistry is far more forgiving here than older NMC cells.

    Weight. The Delta Pro is heavy. If you’re planning to move it regularly, factor this in. It has wheels, but it’s not something you’re easily loading into a truck bed alone.

    Who Should Buy an EcoFlow (and Who Shouldn’t)

    EcoFlow makes sense if you want fast charging, a polished app, expandability, and you’re willing to pay a premium for those things. The Delta 2 is probably the best all-around portable power station on the market right now for most households — not because it’s cheapest or has the biggest battery, but because it balances portability, capacity, output, and recharge speed better than anything else at a comparable price.

    If budget is the primary constraint, other brands offer solid LFP units for less. EcoFlow’s value proposition weakens if you’re just looking for something to sit in a closet and rarely use. Occasional use doesn’t let you take advantage of the fast charging and doesn’t justify the ecosystem premium.

    If you’re building toward a whole-home backup system over time and want a clear upgrade path, ecoflows’ expandable battery ecosystem is one of the most well-thought-out in the industry. You can start with a Delta 2 today and add capacity later. That kind of forward compatibility is worth real money if you’re planning to grow your setup.

    Figure out your actual load requirements first — write down every device you’d want to power, its wattage, and how many hours per day. That exercise changes what you think you need more often than not, and it’s the only honest basis for a decision this size.

  • Jackery USA: What Buyers Actually Need to Know

    Jackery USA: What Buyers Actually Need to Know

    Jackery USA: What Buyers Actually Need to Know

    Disclosure: This site may earn a small commission if you buy through links here, at no extra cost to you.

    If you’ve been researching portable power stations for more than ten minutes, you’ve already landed on Jackery USA. They dominate the category in search results, on store shelves, and in camping forums. That visibility isn’t entirely undeserved — but it also means you’ll find just as much hype as honest information. This guide cuts through both.

    What Jackery Actually Does Well

    Jackery built its reputation on ease of use, and that reputation holds up. The Explorer lineup — their core consumer series — has a consistent interface across models. If you’ve used one, you can pick up another and be running in under two minutes. That matters when you’re handing a unit to a family member who doesn’t want to read a manual.

    Build quality on the mid-range units is solid without being exceptional. The plastic housings feel durable enough for car camping and tailgating. They’re not tank-built for genuine abuse, but they’re not flimsy either. The carrying handles are well-placed and the buttons are tactile. Small things, but they matter.

    The solar ecosystem is genuinely coherent. Jackery’s SolarSaga panels connect directly to their Explorer stations without adapters, and the MPPT charge controllers on most modern units are efficient. If you’re buying both a station and panels, buying them as a matched set from jackery usa usually makes practical sense.

    Where the Trade-Offs Bite

    Here’s where I’d push back against the marketing.

    LFP vs. NMC Chemistry

    For years, most Jackery models used lithium NMC (nickel manganese cobalt) cells. NMC packs more energy density into a smaller package — that’s why these units aren’t enormous — but the trade-off is cycle life. You typically get around 500 charge cycles to 80% capacity with NMC.

    Jackery has been rolling out LFP (lithium iron phosphate) chemistry in select newer models, which pushes cycle life dramatically higher — often 3,000+ cycles. If you’re buying a unit you plan to use heavily for five or ten years, the LFP versions are worth the premium and any size/weight penalty. If you’re not sure which chemistry a specific model uses, check the product page carefully. It’s listed, but not always prominently.

    This distinction matters more than almost any other spec for long-term value.

    Inverter Wattage vs. Surge Capacity

    Jackery’s rated wattages are honest on continuous draw, but surge capacity — the brief spike of power an appliance needs at startup — gets less attention in the marketing. Compressor refrigerators, power tools, and some coffee makers draw significantly more at startup than at steady state. If you’re trying to run a mid-size 12V fridge as a primary use case, verify the surge specs, not just the continuous output. A unit rated at 500W continuous but only 800W surge will struggle with appliances that surge to 1,000W at startup.

    Pass-Through Charging

    Jackery USA does support simultaneous charging and discharging — what’s often called pass-through. But they’ve historically noted that running pass-through continuously can generate heat that accelerates battery wear. For occasional UPS-style backup use, it’s fine. As a full-time home energy buffer, that’s not what these units are designed for. Don’t mistake a portable power station for a full home battery backup system.

    Which Series Is Actually Worth Buying

    Explorer Series (Entry to Mid-Range)

    The bread and butter of the lineup. Models range from compact units suitable for phone and laptop charging up to larger units that can run a full-size fridge for several hours. The sweet spot for most car campers and road trippers is in the 500–1,000Wh range — enough to run a CPAP machine overnight, keep devices charged, and power a light or fan without being too heavy to move easily.

    For anyone buying a first portable station, an Explorer in this range is a reasonable, low-risk choice. You’re not getting the absolute best specs for the dollar, but the user experience is polished and customer support through jackery usa is generally responsive.

    Explorer Pro and Plus Series

    These sit above the standard Explorers with improved charge speeds, better inverter wattages, and — on some models — LFP chemistry. If you’re willing to spend more and plan to use the unit regularly, the Pro/Plus variants are where Jackery actually earns its premium over budget competitors. The faster solar input on some Plus models is a real differentiator if you’re doing multi-day trips with panel charging.

    Larger “Power Station” Models (2,000Wh+)

    Jackery has pushed into the high-capacity market with units designed for extended outages and off-grid setups. These compete more directly with brands like EcoFlow and Bluetti. At this tier, the comparison gets serious. Charging speeds, expandable battery support, and smart app integration vary significantly across brands, and jackery usa doesn’t always win on specs at the high end.

    If your primary use case is home backup during outages rather than portability, spend extra time comparing before defaulting to Jackery at this capacity level.

    Buying From Jackery USA Directly vs. Retailers

    Jackery runs frequent sales on their own site — Black Friday deals in particular tend to be substantial. Amazon pricing is usually competitive but not always the lowest. Costco occasionally carries Jackery bundles that represent genuine value, though selection is limited.

    Warranty is worth noting: Jackery USA covers their products with a standard warranty, and they do honor it. The key detail is that registering your product on their site typically extends your coverage period — check the current terms on their site, as this has changed over time. It takes about two minutes and is worth doing.

    Avoid gray-market sellers on secondary marketplaces. Jackery warranty claims require proof of purchase from an authorized seller, and a discounted price from an unknown reseller isn’t worth voiding your coverage on a several-hundred-dollar purchase.

    What Competitors Do Better (and Worse)

    EcoFlow generally leads on AC charging speed across its lineup — their dual-charging feature, which combines solar and AC simultaneously, can fully charge a large unit faster than most Jackery models. If fast recharge from the wall matters to you, EcoFlow has an edge.

    Bluetti’s LFP lineup is strong for long-term use cases and they offer expandable battery systems at a competitive price point. Their interface is more complex, which is either a feature or a drawback depending on how you feel about configuration options.

    Goal Zero is a legitimate alternative for people deeply invested in a solar ecosystem, though pricing tends to run higher.

    Jackery’s actual advantages are simplicity, reliability, and brand support — jackery usa has a real US-based presence, which matters if you ever need to deal with a warranty claim or technical issue. That’s not nothing.

    Practical Buying Checklist

    Before you finalize any Jackery purchase:

    • Confirm the cell chemistry. LFP if you plan to use it heavily; NMC is fine for occasional use.
    • Add up your wattage needs. List every device you’d run, then size up slightly rather than buying right at your calculated maximum.
    • Check AC charge speed. Some smaller units charge slowly from the wall — if you need fast turnaround, verify the input wattage spec.
    • Look at solar input specs if you’re buying panels. Maximum solar input wattage and voltage range both matter for real-world charging performance.
    • Register after purchase. Warranty extension is usually available and often ignored by buyers.

    The right Jackery is a genuinely capable tool for camping, van life, and light backup power. The wrong one — wrong chemistry, wrong capacity, wrong inverter specs for your appliances — will frustrate you and sit unused. The specs are all published. Take fifteen minutes to match them to your actual use case before buying.

  • Portable Power Station Buying Guide: What Actually Matters

    Portable Power Station Buying Guide: What Actually Matters

    Portable Power Station Buying Guide: What Actually Matters

    Disclosure: Some links on this site may earn a small commission at no extra cost to you.

    A portable power station sounds simple—battery inside a box, plug stuff in. But spend time testing them and you quickly learn that two units with identical watt-hour ratings can perform completely differently in real use. One runs your CPAP through the night; the other shuts off at 3 a.m. because the inverter choked on a startup surge. The specs on the box don’t tell you that story. This guide does.


    Capacity Is Not the Whole Story

    Every portable power station lists a watt-hour (Wh) number. A 1,000 Wh unit should, in theory, run a 100W device for ten hours. In practice, you lose somewhere between 10–20% to inverter conversion inefficiency—more if it’s a cheaper unit. Cold temperatures cut lithium capacity noticeably; below freezing you might get 70–80% of rated capacity.

    So when you see 1,000 Wh, mentally budget around 800 usable watt-hours under normal conditions. Plan for less in winter.

    More importantly, pay attention to continuous output wattage, not just capacity. A station with 1,000 Wh but only a 600W inverter can’t run most portable refrigerators or coffee makers. And peak (surge) wattage matters for inductive loads—motors in refrigerators, sump pumps, and power tools need 2–3x their running wattage to start. A unit advertised with a 2,000W peak might only sustain that for half a second. Know the difference.


    Battery Chemistry: LFP vs. NMC

    portable power station

    This is the single most important spec most buyers overlook.

    NMC (lithium nickel manganese cobalt) batteries are energy-dense, which is why they dominated early portable power stations—you get more capacity in a smaller, lighter package. The trade-off is cycle life. Most NMC units are rated for 500–800 charge cycles before capacity degrades to 80%. Use it daily and you’re replacing it in two years.

    LFP (lithium iron phosphate) has a lower energy density—heavier for the same capacity—but the cycle life is dramatically better. Many LFP units are rated for 3,000+ cycles. The chemistry is also more thermally stable; it doesn’t enter thermal runaway as readily as NMC, which matters if you’re using it in a hot garage or enclosed van. If you plan to use a portable power station heavily, or want something that lasts a decade, LFP is worth the extra weight.

    For occasional camping trips, NMC is fine and often cheaper. For a home backup that charges from solar daily, go LFP. Don’t let anyone talk you out of this distinction.


    Inverter Quality: The Part Nobody Talks About

    portable power station

    The inverter converts stored DC power to the AC your appliances need. Cheap inverters produce a modified sine wave. Most electronics tolerate it—your phone charger doesn’t care—but some devices are sensitive: certain CPAP machines, laser printers, some power tools with brushless motors, and audio equipment. Modified sine wave can cause humming, overheating, or outright refusal to run.

    Every reputable portable power station made in the last few years uses a pure sine wave inverter. If a listing doesn’t specify, or you see “simulated sine wave,” walk away.

    Beyond sine wave quality, look at how well the inverter handles surge loads. Some units throttle back under sustained high draw. A 2,000W rated inverter that throttles to 1,500W after 30 seconds is a real thing—it just doesn’t show up in spec sheets. User forums and teardown reviews are your best source here.


    Charging: Speed, Sources, and Real Flexibility

    portable power station

    AC Wall Charging

    Fast wall charging has gotten genuinely impressive. Some units can go from near-empty to full in under an hour. But there’s a catch: fast charging generates heat, and repeated fast-charging accelerates battery degradation. Many units let you enable a slower “standard” charge mode. Use it when you’re not in a hurry.

    Solar Input

    Solar compatibility specs are often listed in the most confusing way possible. What you need to know:
    Max solar input wattage: how fast it can charge from panels
    MPPT vs. PWM controller: MPPT is more efficient, especially in partial shade—it’s standard on any serious unit
    Voltage range: must match your panel’s output voltage; mismatches mean zero charging or damaged equipment

    A portable power station with a 400W solar input sounds fast until you realize your two 200W panels rarely produce anywhere near rated output in real conditions. Budget for roughly 70–75% of panel wattage in practical harvesting.

    Car Charging and Pass-Through

    Cigarette-lighter 12V charging is slow—useful on long drives, not for emergency prep. Some units accept a higher-voltage DC input from a car’s alternator if you wire it properly; that’s faster. Pass-through charging (running devices while the station charges) works on all modern units but generates more heat and slightly stresses the battery—fine occasionally, not ideal as a permanent UPS setup unless the unit is specifically rated for it.


    What Size Do You Actually Need?

    Stop guessing and do five minutes of math.

    List the devices you’d realistically run. Multiply each device’s wattage by the hours you’d run it. Add them up. That’s your minimum Wh target—then add 20–25% for inverter losses and buffer.

    Some examples to calibrate against:
    – A standard CPAP without a heated humidifier runs around 30–50W. A 500 Wh station covers a full night comfortably.
    – A full-size refrigerator pulls 100–200W but cycles; budget 500–800 Wh per 24 hours depending on efficiency.
    – A window AC unit will drain almost any consumer portable power station inside a few hours. If climate control is the goal, you need expandable capacity or solar input to keep up.
    – Charging laptops and phones is trivial. A 300 Wh unit handles a weekend trip for two people’s devices.

    Most buyers buying for emergencies underestimate how long an actual outage lasts. A one-day backup and a three-day backup require very different equipment.


    Features Worth Paying For (and a Few That Aren’t)

    Worth it:
    – Expandable battery capacity (some systems let you add battery modules)
    – A proper app with real-time watt-in/watt-out monitoring—it transforms how you manage power
    – Multiple AC outputs (at least two; preferably four)
    – USB-C PD at 100W or higher—covers almost every modern laptop
    – Quiet fan management—some units run fans constantly; others only kick them on under load

    Not worth the premium for most buyers:
    – Built-in wireless charging pads—slow and often positioned awkwardly
    – Overly complex LCD dashboards on units under 500 Wh—they’re fine but not a reason to pay more
    – “Tactical” branding and military-grade claims with no substance behind them


    A Few Buying Mistakes to Avoid

    Buying by weight alone is a mistake in both directions. Heavy can mean robust LFP chemistry—or just a cheap, heavy case. Light can mean efficient engineering—or a suspiciously small real-world capacity.

    Don’t ignore the warranty and the company behind it. A two-year warranty from a company with no U.S. service presence is close to worthless. Look for brands that have been around long enough to actually honor claims.

    Finally: buy from a category where the product has been reviewed under real load conditions, not just unboxing videos. Reviewer teardowns that check the actual cell quality, BMS behavior, and inverter output under load will tell you more than any spec sheet ever will. Seek those out before you commit to any portable power station over a few hundred dollars.

    The market has matured significantly. There’s genuinely good equipment at most price points now. But the gap between a thoughtful purchase and a regretted one still comes down to understanding a handful of specifics—and now you do.