Author: offgrid

  • Pecron Power Station: What It Is and How It Performs

    Pecron Power Station: What It Is and How It Performs

    This article contains affiliate links; we may earn a small commission if you purchase through them, at no extra cost to you.

    Pecron Power Station: What It Is and How It Performs

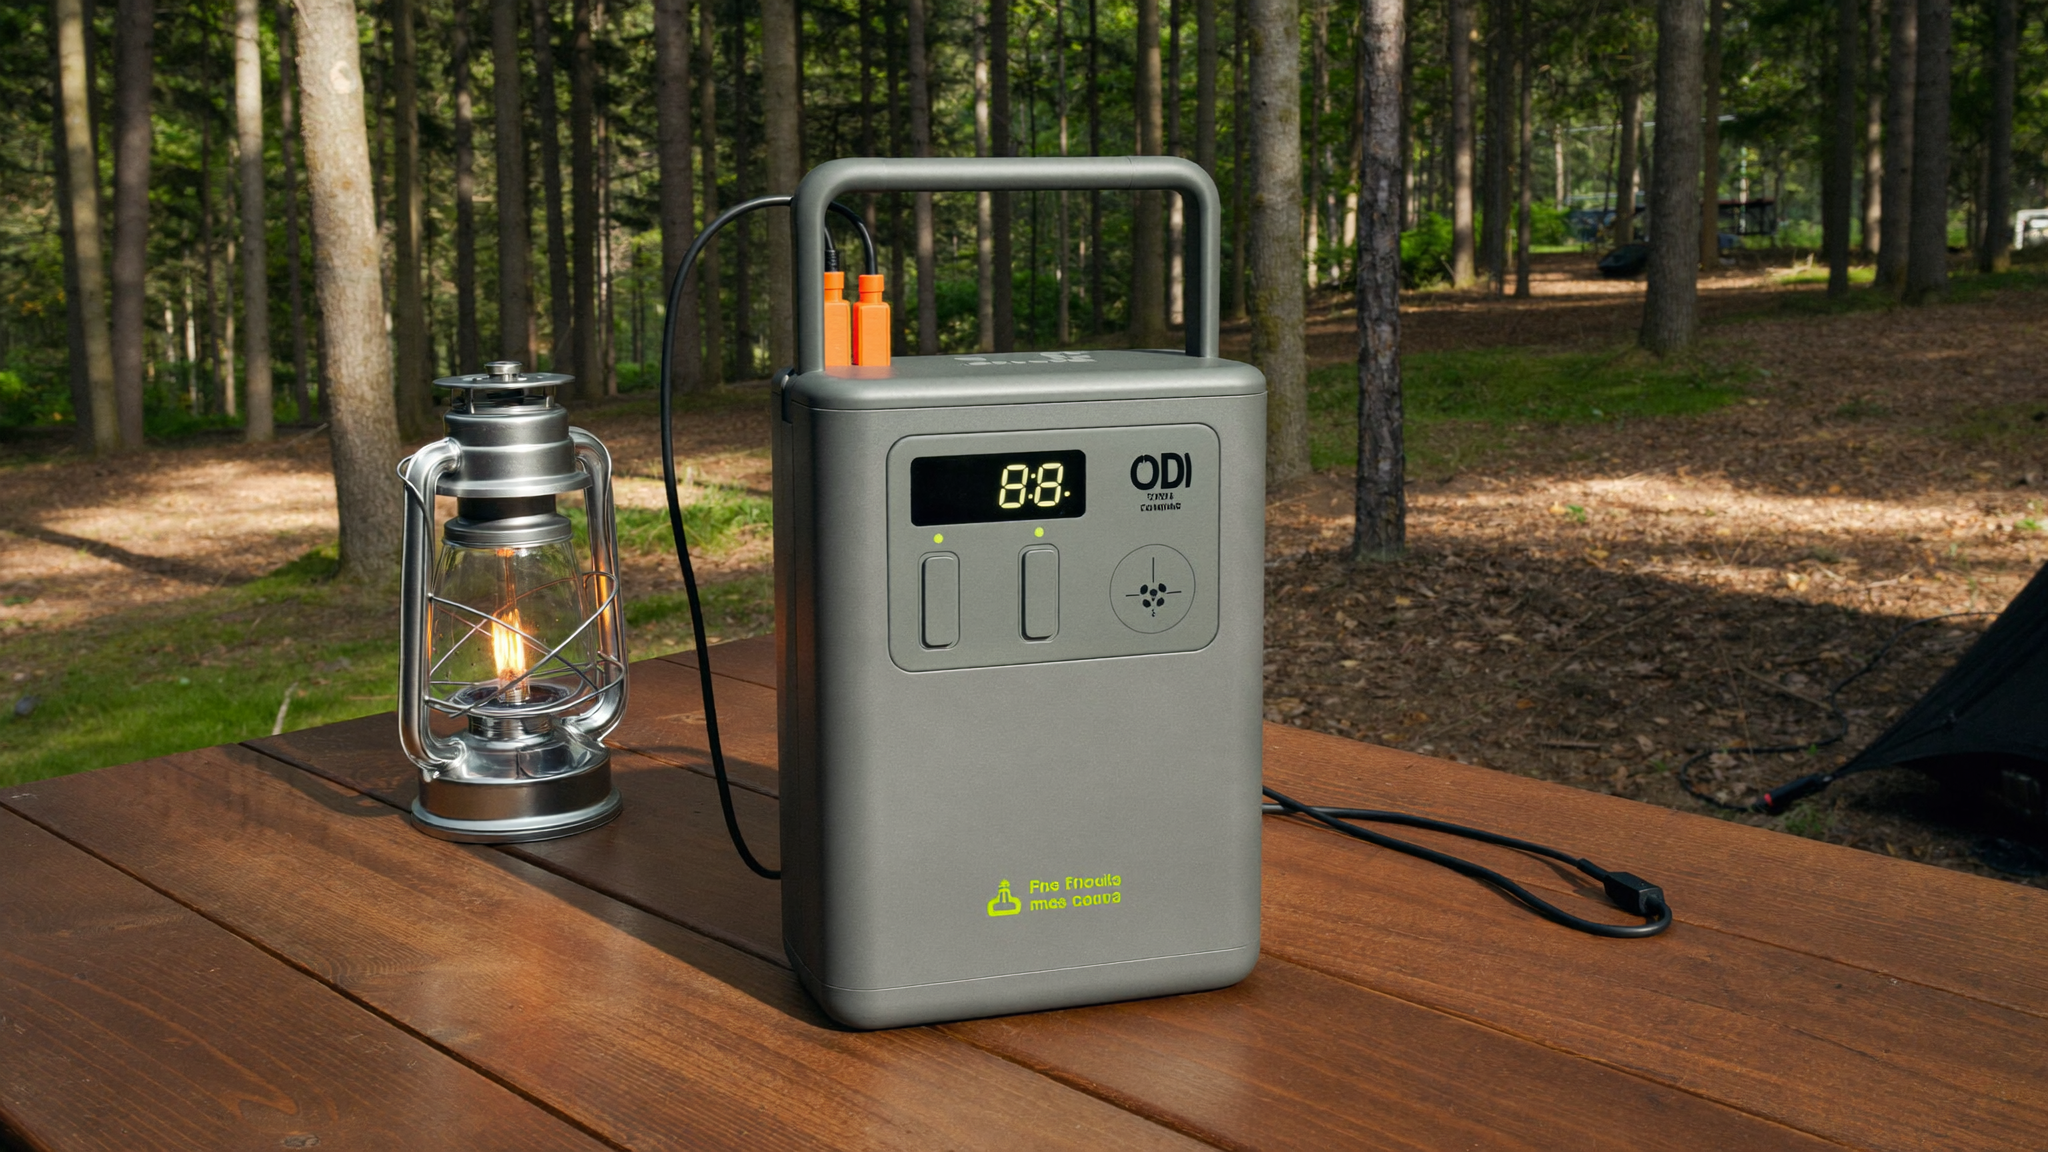
    Pecron isn’t a household name yet, but that’s changing. The pecron power station lineup has been quietly gaining traction among van-lifers, emergency-preparedness folks, and anyone who wants reliable off-grid power without paying flagship-brand prices. I’ve spent time with several units across the capacity range, and the honest answer is: they’re more capable than their marketing suggests, but they also have some real limitations worth knowing before you commit.

    Who Makes Pecron and Where Do They Fit?

    Pecron is a Chinese manufacturer that’s been producing portable power stations and solar generators for several years. They sit in the mid-market tier — not the ultra-budget end where build quality gets dicey, but not the premium segment either. Their products are generally well-regarded for solid battery management systems and honest capacity ratings, which isn’t something you can take for granted in this category.

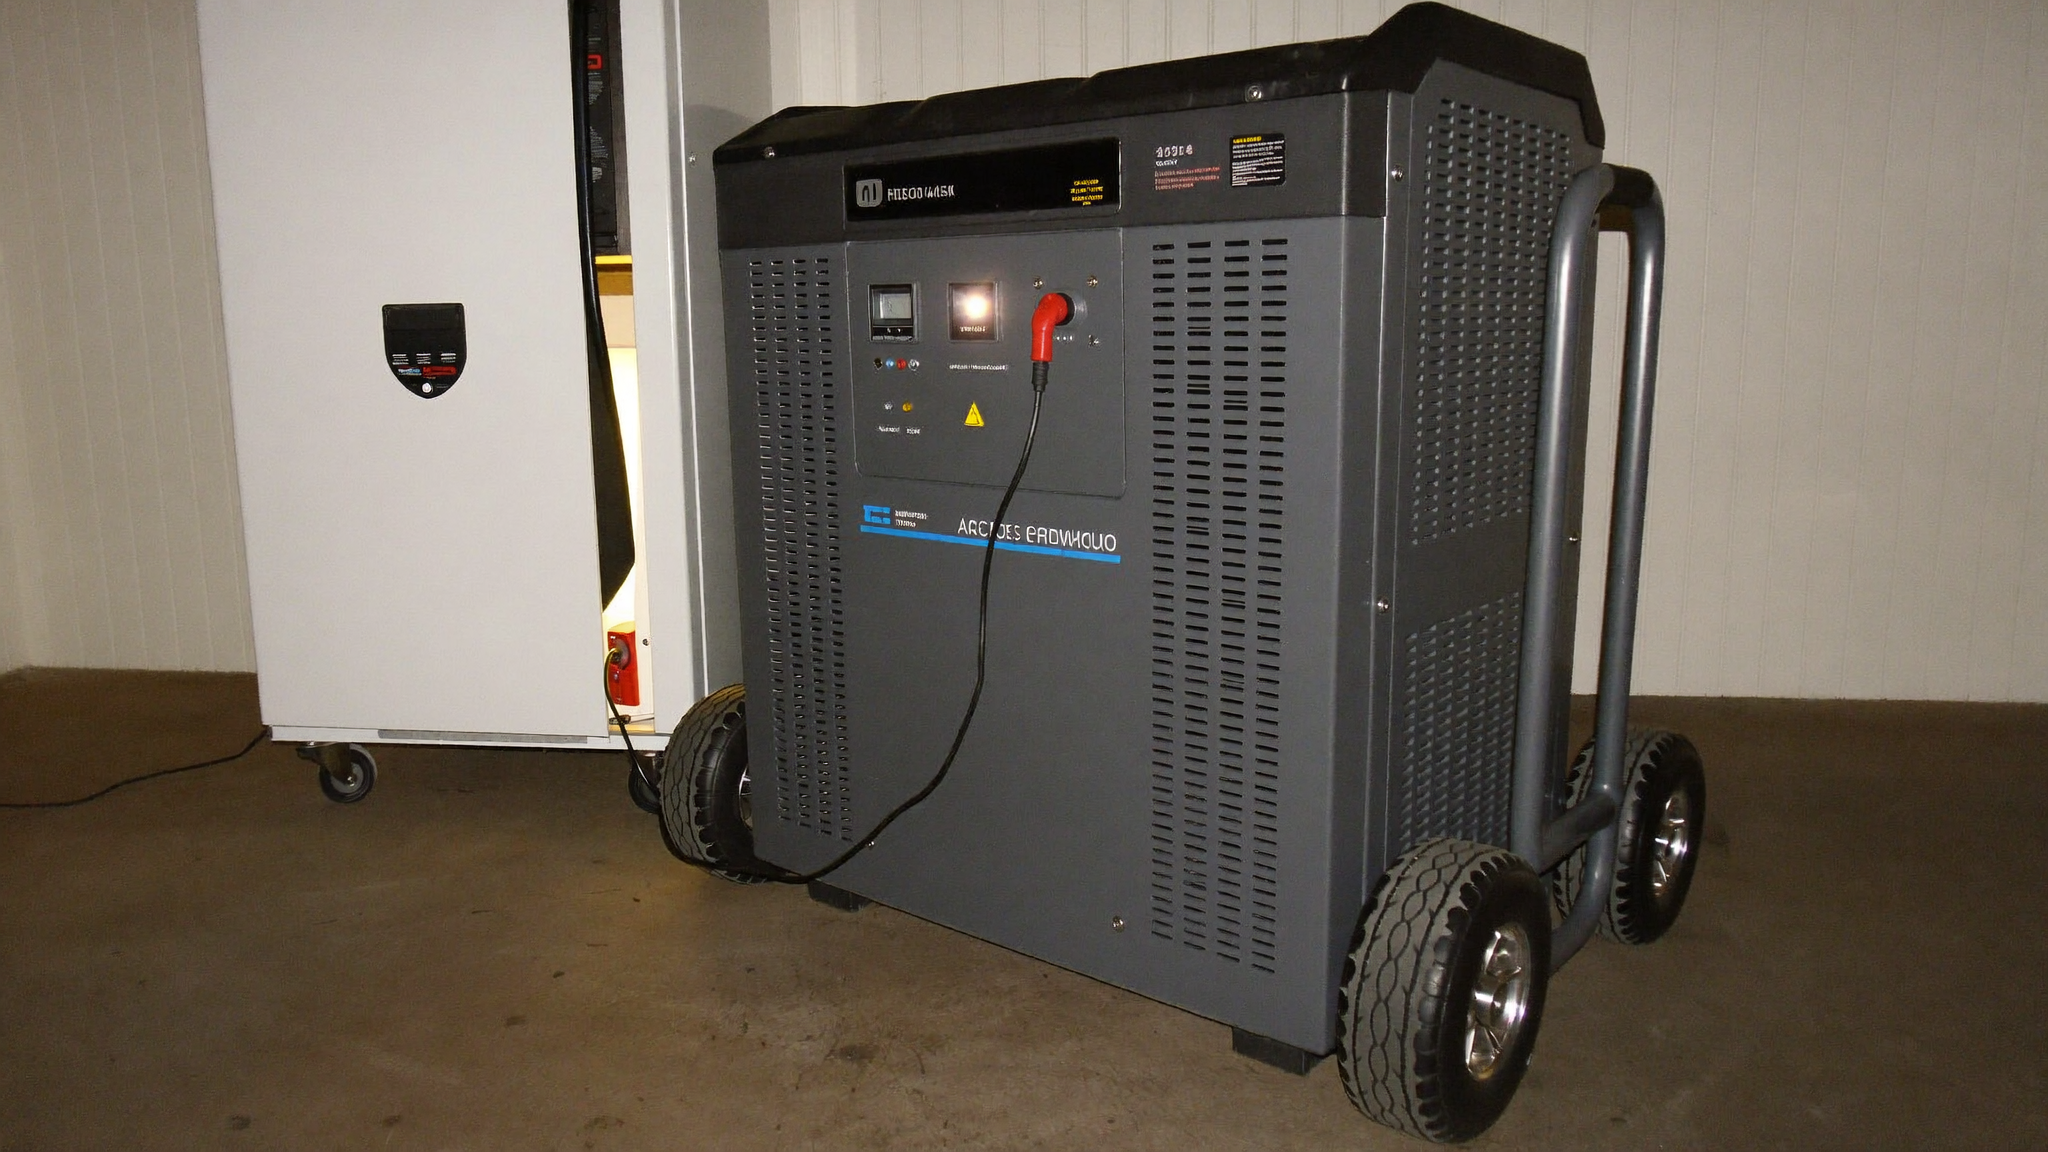
    What distinguishes them from the crowded mid-market field is their focus on high-capacity units with fast AC charging. While many competitors in the same price range top out around 500–1000Wh, Pecron has pushed into multi-kilowatt territory with expandable or large fixed-capacity designs. That matters a lot if you’re trying to run a refrigerator through a two-day outage or power a small workshop off-grid.

    Capacity Tiers: How the Lineup Breaks Down

    Entry-Level and Mid-Range Units

    The smaller pecron power station models — roughly in the 500–1000Wh range — are straightforward portable units built around lithium iron phosphate (LiFePO4) chemistry. LiFePO4 is the right call here. It handles more charge cycles than standard lithium-ion, runs cooler, and is considerably safer. For something that’s going to sit in a closet most of the year and then work hard during a power outage, that longevity matters.

    These smaller units typically cover:
    – Multiple AC outlets (usually 2–4)
    – USB-A and USB-C ports, with at least one Power Delivery port for fast charging laptops
    – A 12V DC output for car-style accessories
    – An Anderson port or XT60 connector for solar input

    Real-world output from the AC inverter in these models is consistently close to rated wattage. Some portable power stations derate significantly under load — you ask for 300W and get 250W. That wasn’t my experience with the Pecron units I tested. They ran close to their rated continuous output without the inverter cutting out prematurely.

    High-Capacity and Expandable Units

    This is where Pecron gets more interesting. Their larger offerings push into the 2000Wh+ range, and some support battery expansion packs that can take total capacity up to several kilowatt-hours. That’s genuinely useful for extended off-grid living or as a whole-home backup for critical circuits.

    The larger pecron power station units also support dual AC charging — meaning you can plug in from the wall while simultaneously charging via solar. Combined, some models accept 2000W+ of input, which means you can refill a 2000Wh unit in about an hour. That’s a serious spec. For comparison, plenty of units in the same price neighborhood charge at 400–600W AC, making a full recharge an overnight affair.

    I ran a full-size refrigerator (around 150W running draw, 600W startup surge) alongside a CPAP machine and laptop through one of the larger units during a 28-hour test. The battery management system handled the startup surge cleanly every time. No trips, no error codes.

    Solar Charging: What Actually Works

    Pecron advertises broad MPPT voltage windows on most models, typically accepting solar panel arrays up to 100–150V open-circuit voltage on mid-range units and higher on the large units. That’s practical — it means you can chain multiple 100W panels in series without immediately exceeding the input limit.

    In direct sun with a 400W panel array, I saw input rates close to advertised maximums, which is actually better than average. Many portable power stations claim peak solar input but are consistently throttled by conservative MPPT controllers. Pecron’s units seemed to track maximum power point effectively.

    Cloud cover performance was unremarkable — about what you’d expect from any MPPT system. Don’t plan your energy budget around intermittent sun; plan it around your worst expected solar day and add margin.

    Solar Panel Compatibility

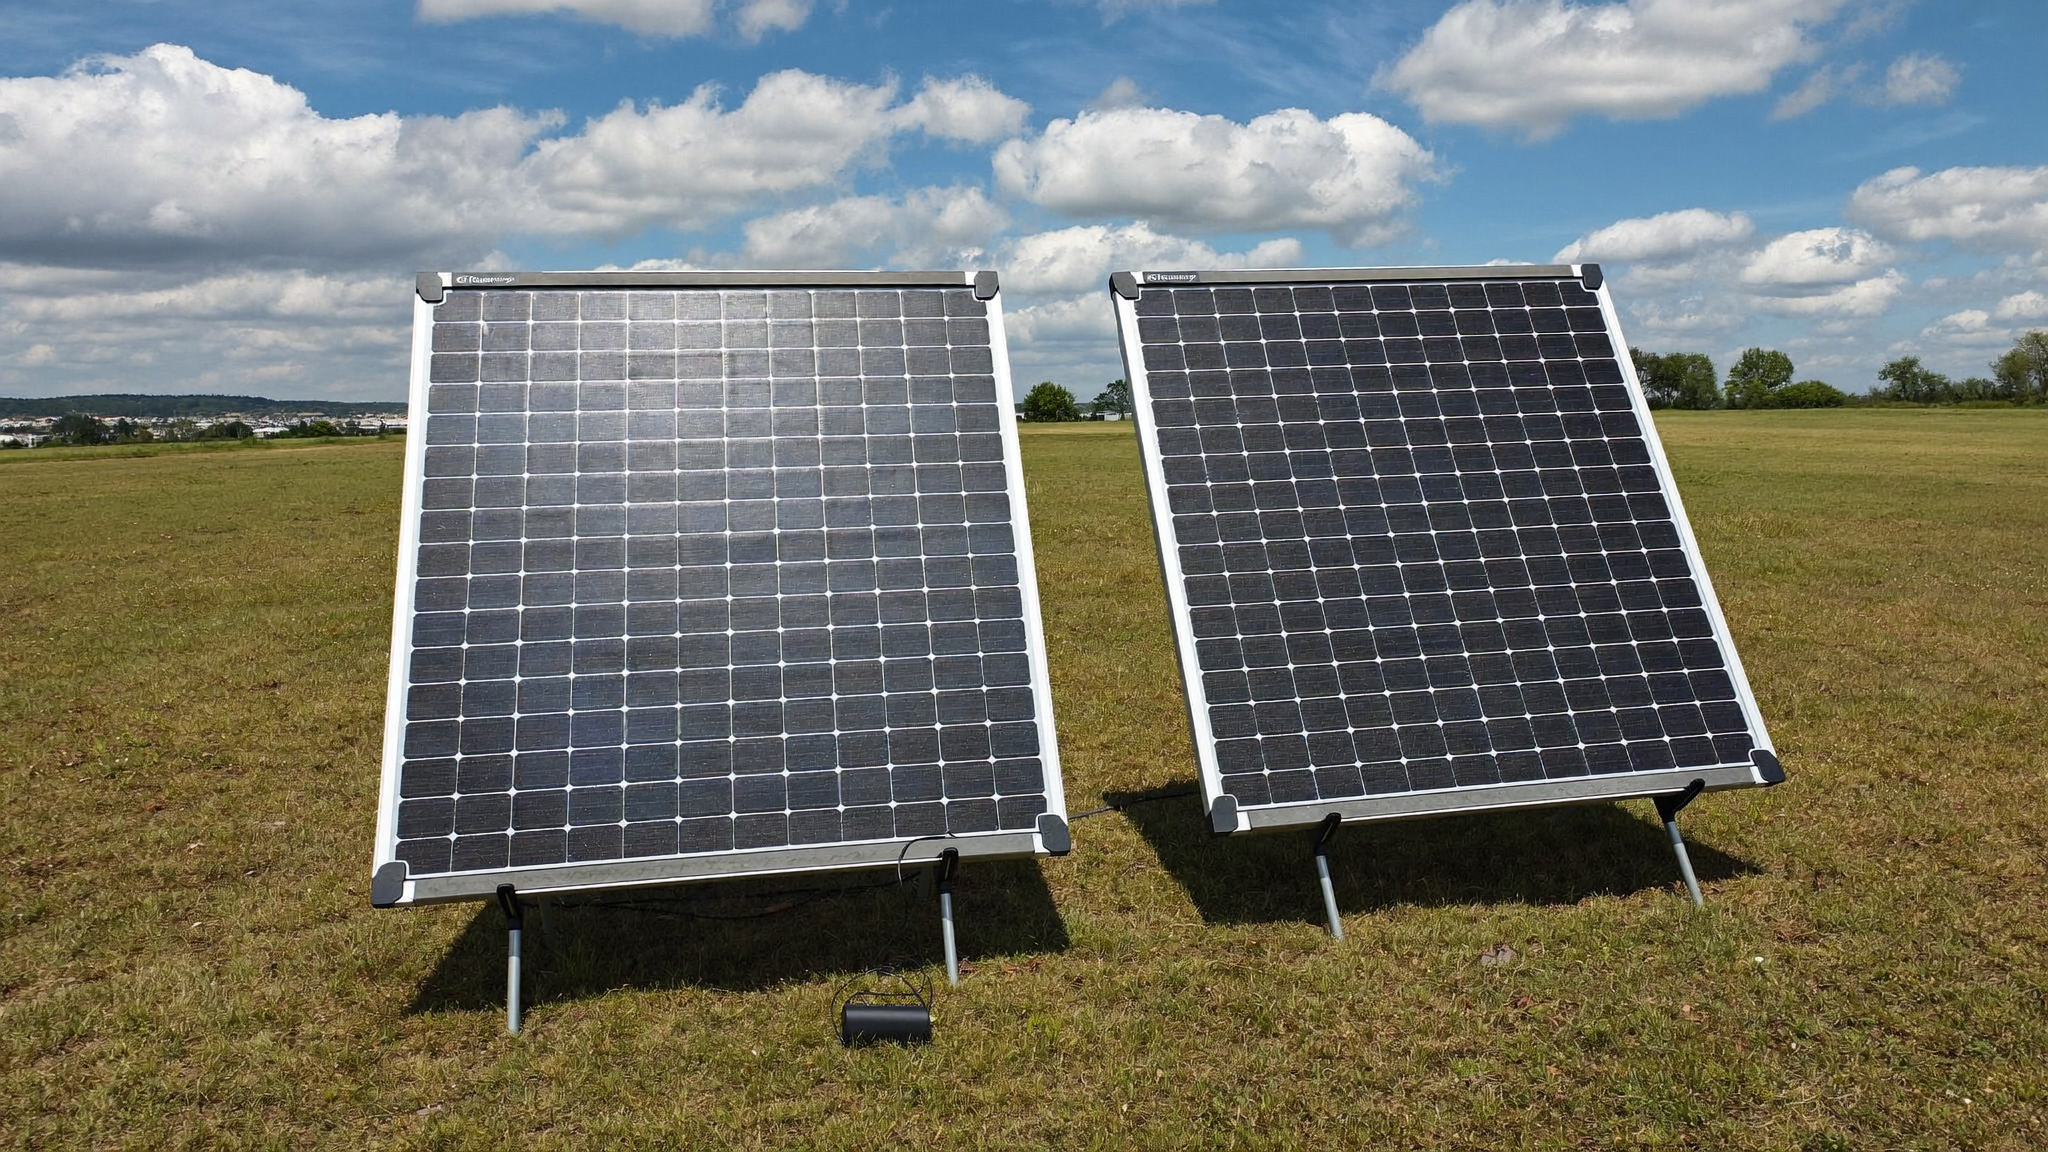
    Pecron sells their own branded solar panels, but the units accept third-party panels just fine through standard MC4 connectors. If you already own portable solar panels, check the voltage and wattage specs against the unit’s input limits. As long as your array’s open-circuit voltage stays within the rated window, you’re fine.

    The Inverter: Pure Sine and Why It Matters

    Every pecron power station I’ve encountered uses a pure sine wave inverter. This is non-negotiable for anything with a motor (refrigerators, power tools, medical equipment) or sensitive electronics (CPAP machines, audio gear, anything with its own power brick). Modified sine wave units are cheaper to build but cause problems with a surprising range of devices. Pecron doesn’t cut corners here.

    The inverter efficiency rating — how much stored energy actually reaches your device versus gets lost as heat — hovers around 85–90% at typical loads. Push it to maximum rated output continuously and that efficiency drops somewhat, which is normal. The practical upshot: when estimating runtime, assume you’ll get about 85–87% of the rated capacity in usable output from most loads.

    Legitimate Limitations to Know

    No power station is without tradeoffs, and the pecron power station lineup has a few worth naming directly.

    App connectivity is hit or miss. The companion app, used for monitoring state of charge and setting charge limits, works reasonably well on Android in my experience. iOS connectivity has been less reliable, with some users reporting dropped connections and delayed data. If app-based monitoring is central to your use case, test it thoroughly in the return window.

    Display readability in bright sun on some models is poor. The backlit LCD screens that look great indoors wash out completely in direct sunlight. If you’re using one on a bright patio or in a vehicle, you’re often guessing at the charge percentage. A few models have improved this with higher-brightness displays, but it’s not consistent across the lineup.

    Weight on large units is real. A 2000Wh+ LiFePO4 unit is going to weigh somewhere in the 40–60 lb range regardless of who makes it — that’s just physics. Pecron includes integrated handles and, on larger models, wheels. But if you’re comparing portability as a key factor, the smaller units are genuinely portable; the big ones are more accurately described as moveable.

    Customer support can be slow during peak demand periods. For warranty claims and technical questions, email response times of several business days are common. This is fairly typical across the category for non-flagship brands, but it’s worth setting expectations.

    Best Real-World Use Cases

    Based on actual use rather than spec sheets:

    • Emergency home backup — the larger units with fast AC charging are genuinely practical for keeping a refrigerator, lights, phone charging, and medical devices running through typical 12–48 hour outages
    • Overlanding and van life — mid-range units with solar input pair well with rooftop or portable panel arrays; the LiFePO4 chemistry tolerates temperature swings better than alternatives
    • Worksite power — corded tools with moderate wattage requirements run cleanly off the pure sine inverter; avoid sustained high-draw tools like angle grinders on smaller units
    • RV supplemental power — a pecron power station used alongside shore power or generator charging can significantly reduce generator runtime

    Firmware and Long-Term Software Support

    This is an area where smaller brands sometimes fall short. Pecron has pushed firmware updates for at least some models post-launch, which is a good sign. The updates have addressed charging efficiency and display accuracy issues in documented cases. Whether that support continues years down the line is unknown — that’s an honest uncertainty with any non-flagship brand.

    If long-term software support is critical to you, stick with manufacturers that have demonstrated multi-year commitment to their existing products. Pecron’s track record here is still being established.

    Final Thought

    The pecron power station lineup earns its reputation as a serious mid-market option rather than a budget gamble. The LiFePO4 chemistry, fast AC charging on larger units, and honest inverter output are the genuine strengths. The app inconsistencies and support response times are the real friction points. For most people using these as emergency backup or off-grid power — not as always-connected smart home devices — those tradeoffs land in Pecron’s favor.
  • Solar Power and Battery Storage: How It Actually Works

    Solar Power and Battery Storage: How It Actually Works

    Solar power and battery storage are two separate technologies that become genuinely useful when they work together. Solar panels generate electricity when the sun is out. Batteries hold that electricity so you can use it when the sun isn’t. That’s the core of it — but the details between those two sentences are where most people get tripped up, and where the real decisions live.

    This article covers how the system works from panel to outlet, what actually limits performance, and how to think about sizing a setup for your situation.

    How Solar Generation Actually Works

    A solar panel is made of photovoltaic cells that produce direct current (DC) electricity when sunlight hits them. The amount of power produced depends on three things: panel wattage, sunlight intensity, and panel temperature.

    Panel wattage is the rated output under ideal lab conditions — bright, direct sun at a cool temperature. In real use, you’ll consistently get less. Partial shade, haze, morning and evening angles, and even hot weather all reduce output. A 200W panel on a good sunny day in a temperate climate might average 150W of actual production over the usable solar hours.

    Peak sun hours are the key metric for estimating daily output. This isn’t the total hours of daylight — it’s the number of hours per day when solar intensity is equivalent to 1,000 watts per square meter. Most of the continental US gets between 4 and 6 peak sun hours, depending on location and season. Desert Southwest gets more; the Pacific Northwest gets significantly less.

    So a 200W panel in a 5 peak-sun-hour location produces roughly 1,000 watt-hours (1 kWh) on a good day. That’s before any system losses.

    DC vs. AC and the Role of the Inverter

    Most household devices run on AC power. Solar panels produce DC. Something has to bridge that gap.

    In a portable power station, the inverter is built in. In a home solar installation, it’s a separate component — either a string inverter, a microinverter on each panel, or a hybrid inverter that also manages battery charging. Conversion always involves some efficiency loss, typically 5–10%. That loss matters when you’re calculating how much usable energy you actually have.

    How Battery Storage Fits In

    Solar power and battery storage pair together to solve the fundamental mismatch between when solar generates power (midday) and when people actually need it most (evenings, nights, cloudy days, grid outages).

    Batteries store the surplus electricity your panels produce during the day. When generation drops — clouds roll in, the sun sets — you draw from the battery instead of the grid or instead of going without power entirely.

    Battery Chemistry Matters

    The two chemistries you’ll encounter most are lithium iron phosphate (LFP) and traditional lithium-ion (NMC).

    LFP batteries run cooler, tolerate more charge cycles before capacity degrades, and are safer in confined spaces. Most quality portable power stations and increasingly home battery systems use LFP. NMC packs more energy into a smaller space but degrades faster and is more sensitive to heat.

    Lead-acid batteries still exist in budget off-grid setups. They’re cheaper upfront but heavier, less efficient, and can only be safely discharged to about 50% of their rated capacity. With LFP, you can use 80–90% of rated capacity regularly without meaningful harm to cycle life.

    Capacity vs. Usable Capacity

    A battery rated at 1,000Wh (1 kWh) doesn’t give you 1,000Wh of usable power. After accounting for inverter losses and the manufacturer’s recommended depth of discharge, you might realistically get 850–900Wh from a quality LFP unit. Lead-acid gives you closer to 500Wh from the same rated capacity.

    This is why comparing battery capacities across chemistries requires adjusting for usable capacity, not just sticker numbers.

    Sizing a Solar-Plus-Storage System

    This is where most guides hand you a vague formula. Here’s a more grounded approach.

    Step 1: Know Your Load

    List what you want to power and for how long. Be specific:

    • A full-size refrigerator runs at roughly 100–150W but cycles on and off, averaging maybe 50–60W over 24 hours — call it 1,200–1,500Wh per day.
    • A CPAP machine without a humidifier draws 30–60W. Eight hours a night is 240–480Wh.
    • A laptop is 45–65W while charging. Two hours a day is under 150Wh.
    • LED lighting, phone charging, and a fan are modest loads — maybe 200Wh combined for a typical day.

    Add up daily watt-hours. That’s your daily consumption target.

    Step 2: Size Your Battery

    Your battery needs to cover at least one day of consumption, preferably two for cloudy-day buffer. If you’re running 2,000Wh/day and want a two-day reserve, you need 4,000Wh of usable capacity. In LFP terms, that’s roughly a 4.5–5 kWh rated system.

    For portable setups — camping, van life, emergency backup — a portable power station with an expandable battery system can reach 2–4 kWh. For a whole-home backup or off-grid cabin, you’re looking at dedicated home battery systems that typically start around 10 kWh.

    Step 3: Size Your Solar Array

    You need your panels to refill the battery in a reasonable window. Divide your daily consumption by your local peak sun hours to find the panel wattage needed.

    2,000Wh ÷ 5 peak sun hours = 400W of panels, before losses. Add 20–25% to account for real-world inefficiencies. Call it 500W of solar to be comfortable.

    More panels than you strictly need isn’t wasteful — it means faster recharge on good days and more resilience on bad ones.

    Where Solar Power and Battery Storage Actually Falls Short

    No system covers every scenario. Honesty here prevents expensive frustration.

    Heavy loads are the real constraint. Electric ranges, central air conditioning, electric water heaters, and EV charging draw enormous power. Running a 1,500W space heater for eight hours eats 12 kWh — more than most residential battery systems hold. Unless you have a very large array and a large battery bank, solar-plus-storage works best when you’re selective about what you power.

    Winter and cloudy climates cut production sharply. Four days of overcast skies can drain a battery bank that solar can’t keep up with. In those climates, a generator backup or grid tie is often part of a realistic system rather than a failure of the concept.

    Charging time is often underestimated. A portable power station rated for 100W of solar input takes ten-plus hours to fully charge from empty in ideal conditions. Most people don’t have ideal conditions. Expect longer.

    Off-Grid vs. Grid-Tied vs. Portable

    These three configurations suit very different situations.

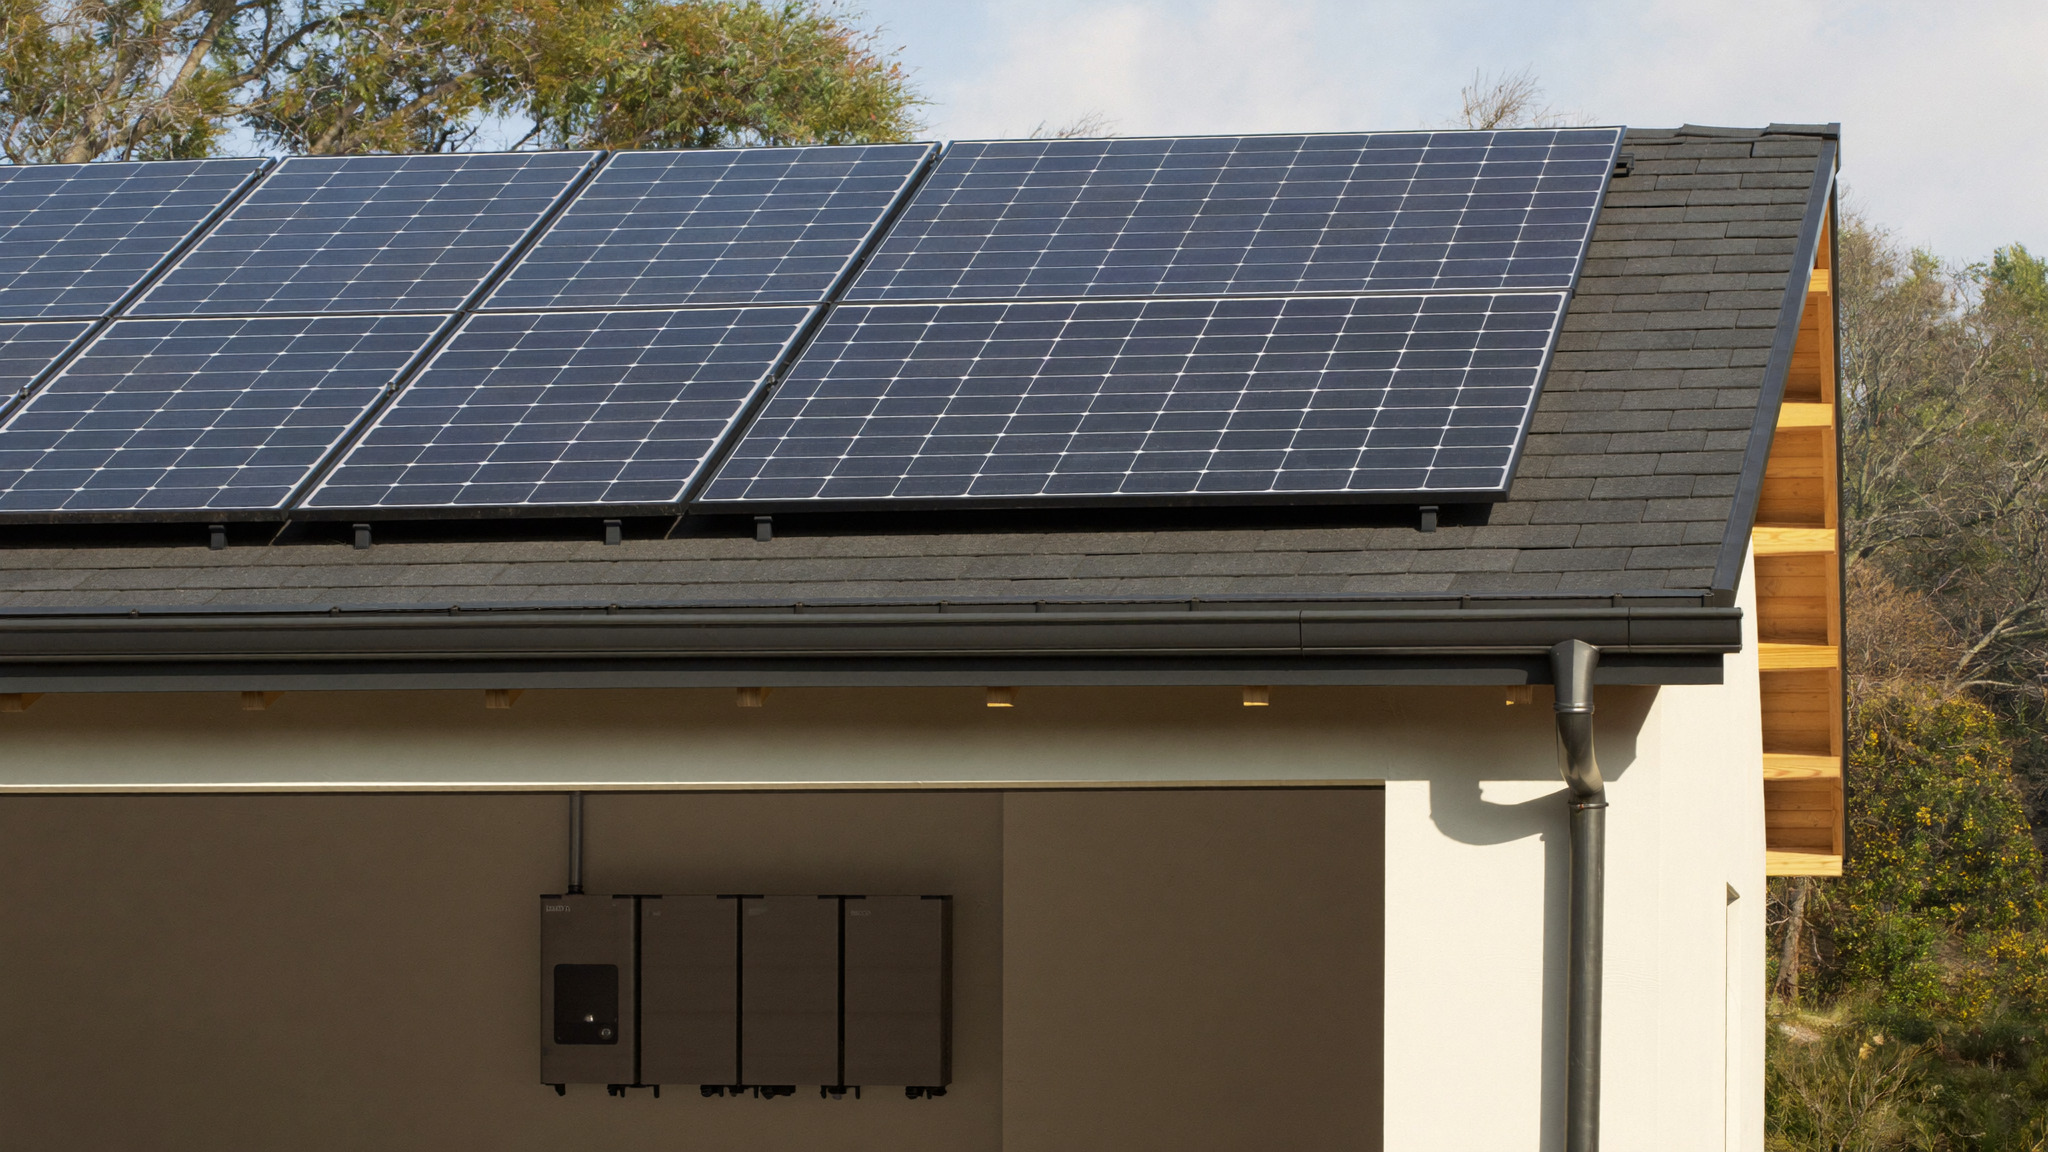
    Grid-tied with battery backup is the most practical for most homeowners. You use the grid normally, export excess solar, and the battery kicks in during outages. You get resilience without needing to fully cover your own loads.

    Off-grid requires a system sized to cover 100% of your needs year-round, including the worst solar month. That means larger arrays, more battery capacity, and usually a backup generator. It’s viable but demands rigorous load management.

    Portable solar-plus-storage — a foldable solar panel paired with a portable power station — is genuinely useful for camping, work sites, and short-term power outages. It won’t run a refrigerator for a week, but it handles lights, devices, fans, and small appliances reliably. The barrier to entry is low, and the learning curve is short.

    Getting the Most From What You Have

    A few practices that consistently improve real-world performance:

    • Angle your panels toward peak sun. Fixed flat panels on a van roof lose 15–30% compared to tilted panels facing the sun directly.
    • Avoid partial shade. Even one shaded cell on a panel can drop output significantly. Position panels in clear sky exposure.
    • Charge batteries in mild temperatures. LFP chemistry charges poorly below freezing and degrades faster in sustained heat.
    • Run high-draw appliances during solar hours. Charge laptops and run the microwave while the panels are generating, not after sunset.

    The mechanics of solar power and battery storage aren’t complicated once you break them into their component parts. Panels generate. Batteries store. Inverters convert. Your loads consume. Size each part to the others, know where the gaps are, and you’ll have a system that does what you actually need it to do.

  • How a Net Meter Works and Why It Matters for Your Home

    How a Net Meter Works and Why It Matters for Your Home

    How a Net Meter Works and Why It Matters for Your Home

    Disclosure: This site earns a small commission on qualifying purchases made through links in our content, at no extra cost to you.

    If you’ve looked at your utility bill after going solar and wondered what those positive and negative kilowatt-hour numbers actually mean, you’ve already met the net meter — you just didn’t have a proper introduction. Understanding it changes how you think about energy storage, backup power, and whether a portable power station even fits into your setup.

    What a Net Meter Actually Is

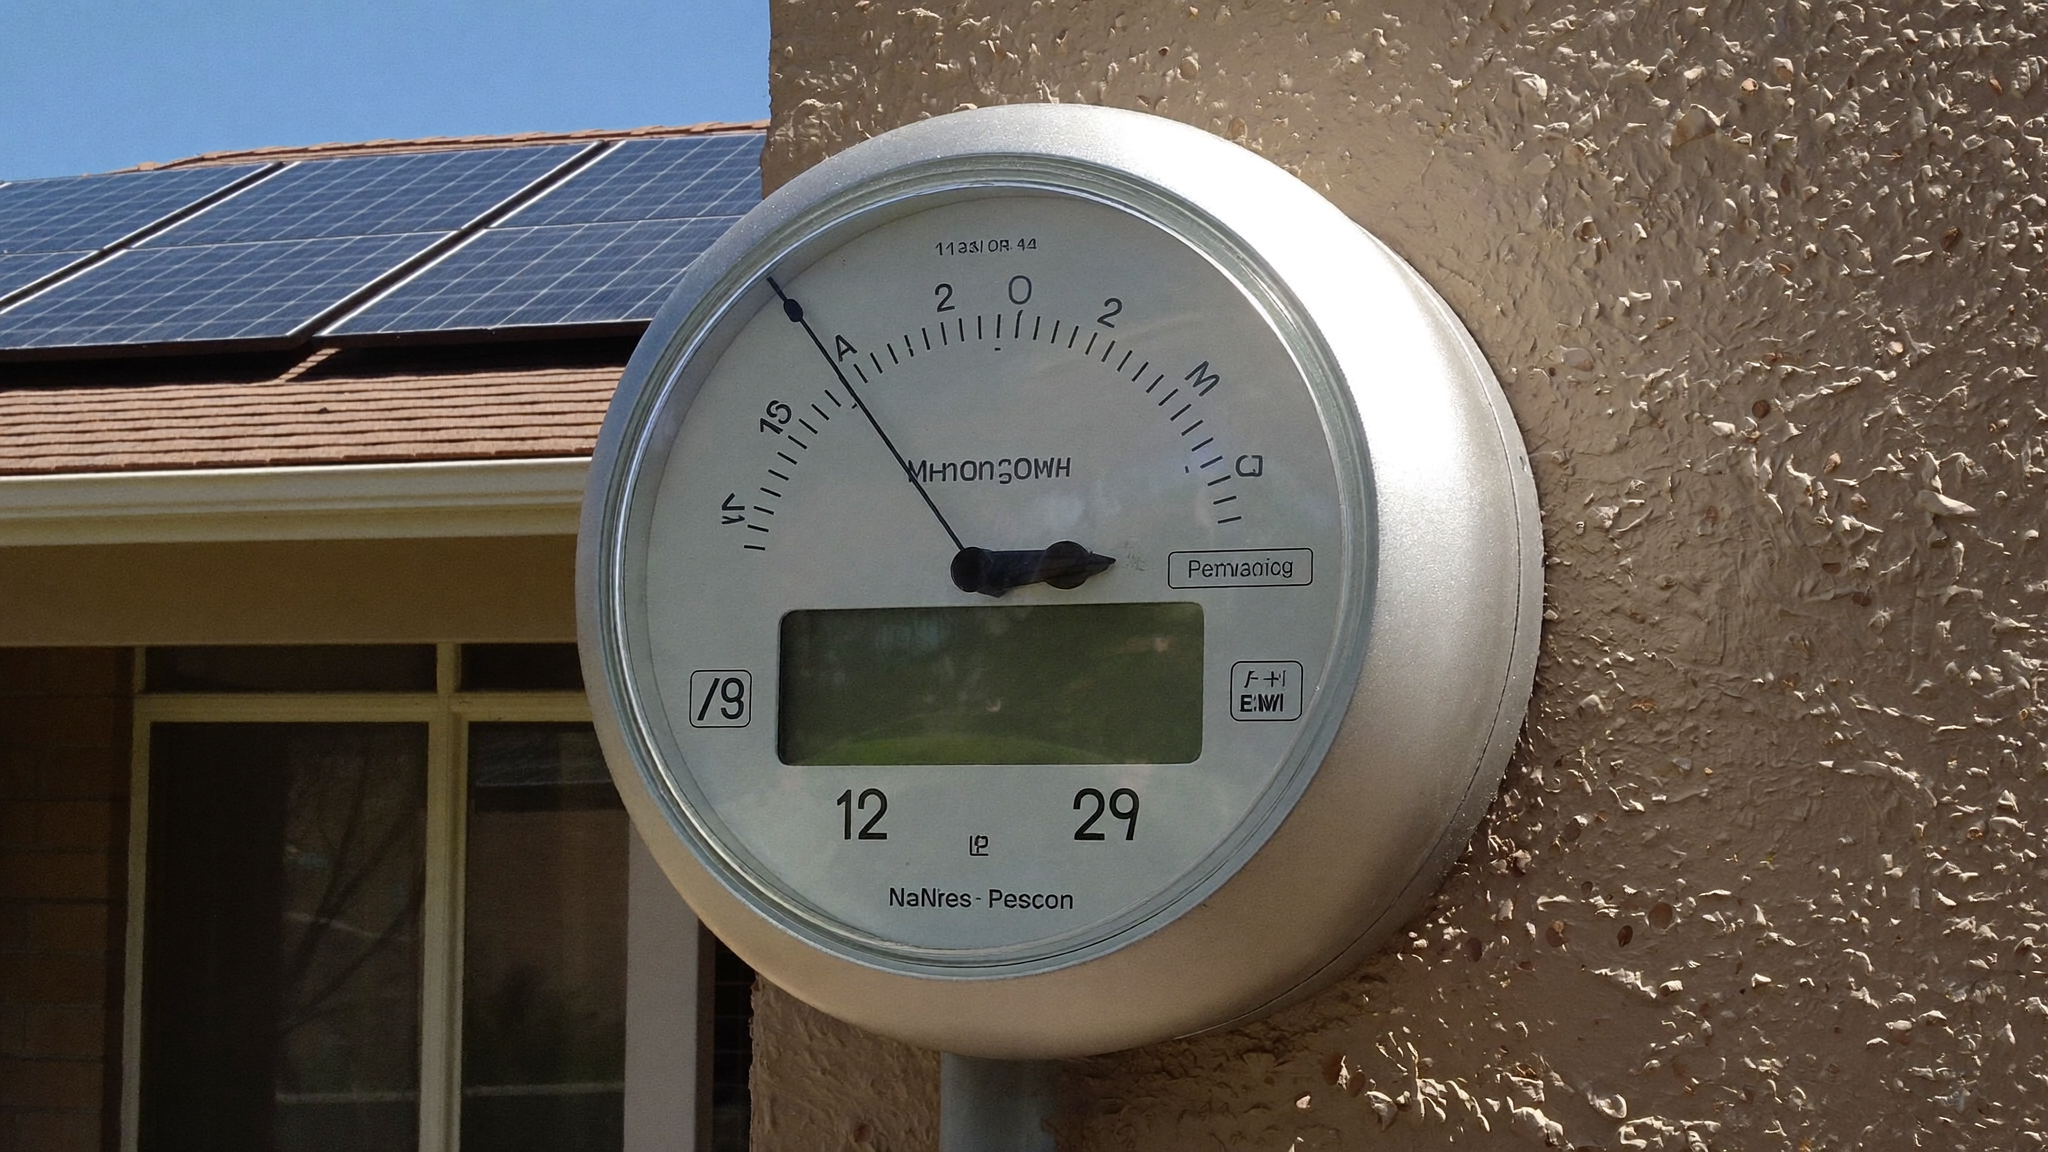
    A net meter is a bidirectional electricity meter. Unlike the old analog dial meters that only measure power flowing into your home, a net meter tracks flow in both directions — power coming in from the grid and power going out from your solar panels or battery system.

    The “net” part is straightforward math: kilowatt-hours exported minus kilowatt-hours imported equals your net consumption for the billing period. If you sent more electricity to the grid than you pulled, you’re in credit territory. If you pulled more than you sent, you owe the difference.

    Modern net meters are almost always digital smart meters. They log interval data — often in 15-minute increments — and report it back to your utility automatically. Some older installations used mechanical meters that could literally spin backward when you exported power; those are rare now, and most utilities have replaced them.

    How It’s Different from a Standard Meter

    A standard meter only counts in one direction. It can’t distinguish between solar production you used on-site and solar production you exported. That distinction matters enormously for billing and for understanding the real value of your system.

    With a net meter, the utility sees two figures:
    – Total kWh imported (what you consumed from the grid)
    – Total kWh exported (what your system pushed back)

    Some utility billing systems show these as separate line items. Others show only the net. Either way, the meter itself is recording both.

    How Net Metering Programs Work

    The meter is just hardware. Net metering is the policy built around it, and these policies vary significantly by state, province, and utility.

    Under full retail net metering — the most favorable version — every kWh you export is credited at the same rate you’d pay to import a kWh. Export a kWh at peak afternoon solar production, get credit worth a kWh of evening consumption. Simple, and genuinely valuable.

    Many utilities have moved away from this model. Increasingly common alternatives include:

    • Avoided cost crediting: You’re credited at the utility’s wholesale or “avoided cost” rate — often 30–50% of retail. Your exported power is worth a lot less.
    • Time-of-use (TOU) net metering: Credit rates shift by time of day. This can actually favor battery storage systems, since you can store solar power and export during peak-price windows.
    • Net billing: Not the same as net metering. Under net billing, the credit for exports and the charge for imports are calculated separately and often at different rates.

    Before assuming your solar installation is set up for true net metering, check your interconnection agreement. The net meter on your wall is neutral — it just measures. The billing policy is what determines your economics.

    Reading Your Net Meter

    Digital net meters typically cycle through several displays. You’ll usually see:

    1. Total kWh delivered — power the grid sent to you
    2. Total kWh received — power you exported to the grid
    3. Sometimes a net total, sometimes instantaneous demand in kilowatts

    If you see a negative number on your bill, that typically means your exported credits exceeded your imports — you’re in surplus. What happens to that surplus depends on your utility. Some roll it forward indefinitely, some expire credits annually, and some cut you a small check at the avoided-cost rate. Letting large credits accumulate is rarely the best financial outcome, which is one reason proper system sizing matters.

    Where Backup Power and Batteries Fit In

    Here’s where things get genuinely interesting — and where a lot of solar customers get confused.

    Battery Storage and the Net Meter

    A home battery system (charged by solar, grid, or both) doesn’t change how your net meter works, but it changes how you interact with the grid. A battery lets you consume your own solar generation instead of exporting it. Whether that’s better or worse than exporting depends entirely on your net metering rate.

    Under full retail net metering, exporting excess solar often makes more sense financially than storing it — you get full retail credit for every kWh you export, and the battery has round-trip efficiency losses. Under avoided-cost crediting, storing your own solar and using it at night beats exporting it at a fraction of retail rate.

    Some utilities require a second meter — a “production meter” — to measure all solar generation regardless of whether it’s used on-site or exported. If you have that configuration, your system monitoring will show three figures: total generation, self-consumption, and net export.

    Portable Power Stations in a Net Metering Household

    A portable power station — essentially a large rechargeable battery with AC/DC outputs — operates completely off-grid within your home. It doesn’t interact with your net meter at all. You charge it from a wall outlet (which does register on the meter as consumption), and when you draw from it during an outage, you’re using stored energy with no grid connection involved.

    This is worth understanding clearly: a portable power station will not generate net metering credits. It’s not a grid-connected device. But for households where the main goal is outage resilience rather than energy economics, a portable power station can be an excellent complement to a solar-plus-net-metering setup. Charge it during the day when your solar panels are covering household loads anyway, and you have a meaningful backup without the cost and complexity of a full home battery installation.

    The practical limitation is capacity. A portable power station can run essential devices — refrigerator, lights, phone charging, a CPAP machine — for hours to a day or two depending on size and usage. It won’t replace a whole-home generator or a large-scale home battery for extended outages.

    Common Misunderstandings About Net Meters

    “My solar panels power my house directly.” Not exactly. In a standard grid-tied solar system, your panels feed power into the home’s electrical panel. What gets used on-site is consumed; what isn’t gets pushed to the grid. During a grid outage, a grid-tied system without battery backup shuts down entirely — a safety requirement so that exported power doesn’t energize utility lines and endanger workers.

    “I’m off-grid because I have solar.” Grid-tied solar with net metering is the opposite of off-grid. You’re deeply integrated with the grid — you’re just using it like a giant virtual battery with credits and debits.

    “My net meter measures my solar production.” It measures net exchange with the grid. On-site solar consumption is invisible to it. To measure total solar production, you need the inverter’s production data or a separate production meter.

    What to Actually Track

    If you have a net meter installed, the numbers that matter most are:

    • Your net kWh over a 12-month period — the truest measure of whether your system is right-sized
    • Your utility’s export credit rate vs. retail rate — determines battery storage economics
    • Seasonal patterns — most solar systems run surplus in summer, deficit in winter; knowing your annual net prevents surprises

    Your utility’s online account portal usually graphs this data now. Use it. Comparing your solar inverter’s production data against your net metering import/export figures tells you exactly how much of your generation you’re self-consuming versus exporting — and whether adjusting your energy use habits (running the dishwasher at noon instead of midnight, for example) would improve your economics.

    The net meter is straightforward hardware doing a simple job. The complexity lives in the policies around it, and in how your broader energy system — solar, batteries, backup devices — interacts with the grid it measures.

  • Collapsible Solar Panels: How They Work and Who Needs One

    Collapsible Solar Panels: How They Work and Who Needs One

    Collapsible solar panels look almost too convenient to be real. You unfold a panel the size of a laptop bag, prop it in the sun, and within a few hours your phone, battery pack, or portable power station has a meaningful charge. That’s not marketing copy — that’s genuinely what happens when the setup is right and the sun cooperates. But there’s real nuance underneath the simplicity, and most articles skip straight to product comparisons without explaining the fundamentals. This one doesn’t.

    What “Collapsible” Actually Means

    The term covers a few distinct designs that behave quite differently in the field.

    Folding panel kits are the most common. Multiple rigid monocrystalline cells sit inside a fabric or semi-rigid case stitched together like a book or accordion. They fold flat for storage and unfold to expose full panel area. These are the workhorses — sturdy, efficient, and widely used with portable power stations.

    Rollable panels use thin-film or flexible monocrystalline cells bonded to a flexible substrate. They roll into a cylinder or tube. Lighter than folding kits, but typically less efficient per square centimeter and more fragile if handled carelessly.

    Briefcase-style panels are sometimes called collapsible even though they’re more accurately described as portable rigid panels with a folding kickstand. They’re heavier than fabric-cased folders, but the cells are better protected and output tends to be more consistent.

    When most people search for collapsible solar panels, they’re thinking of the folding fabric-case style — and that’s the format this article focuses on.

    The Actual Physics of Output

    A 100W panel doesn’t deliver 100 watts continuously. That rating is a laboratory figure measured under Standard Test Conditions: 1000 watts of sunlight per square meter, 25°C cell temperature, specific air mass. Real-world output is almost always lower.

    In practice, expect usable output to be roughly 70–85% of rated wattage under good clear-sky conditions. Drop the panel at an imperfect angle, add a little haze, let the cells warm up on a hot day, and you might see 60% or less. This isn’t a flaw unique to collapsible designs — it applies to rooftop panels too. But it matters more here because you’re often running leaner, relying on this panel as your only source.

    Cell type matters significantly. Monocrystalline cells are more efficient in a given area, which is why a quality folding panel with mono cells can match or beat a larger panel using older polycrystalline technology. Thin-film cells are more tolerant of partial shade and indirect light, but you need more surface area to hit the same wattage.

    What They Charge Well — and What They Struggle With

    Collapsible solar panels are genuinely excellent for:

    • Topping up portable power stations on multi-day trips. A mid-sized folding panel can partially or fully recharge a portable power station with a modest battery capacity over the course of a sunny day, extending your usable electricity essentially indefinitely.
    • Direct USB device charging. Most quality panels include a USB-A or USB-C port with a charge controller built in. Phones, tablets, Bluetooth speakers, and GPS units charge fine directly.
    • Trickle-maintaining 12V systems. Paired with the right controller, a folding panel can maintain a vehicle auxiliary battery or small cabin battery bank during low-demand periods.

    They struggle with:

    • High-draw appliances. A 100W panel in good sun produces maybe 5–8 amps at 12–18V. That’s not enough to meaningfully offset a refrigerator, air conditioner, or anything drawing sustained high wattage.
    • Cloudy or shaded conditions. Output under heavy cloud cover can drop to single-digit watts. Shade on even a small portion of a panel — a branch, a bag handle, your shadow — can disproportionately reduce total output due to how cells connect in series.
    • Continuous vertical mounting. The fabric cases and kickstands on most folding panels aren’t built for permanent installation. They’re designed for setup-and-take-down use, not months of outdoor exposure.

    Setup and Positioning: The Part That Actually Matters

    Panel orientation has a bigger impact on output than most people realize. A panel lying flat on the ground in summer might produce 30–40% less than the same panel tilted toward the sun. The goal is to get the panel face as close to perpendicular with the sun’s rays as possible.

    For a fixed campsite or balcony setup, angle the panel toward true south (in the Northern Hemisphere) at a tilt roughly equal to your latitude. At 40° latitude, a 40° tilt is a reasonable starting point. If you’re using a kickstand panel, adjust the kickstand throughout the day if you can — morning, midday, and afternoon positions each favor a different angle.

    For vehicle-based travel, the roof of a car is rarely optimal unless you stop and reorient. Many overlanders hang collapsible solar panels off a rear window or lean them against the side of a vehicle facing the sun — less elegant but often more effective than flat-mounting on the roof.

    Keep connections clean. The MC4 or DC barrel connectors used on most panels corrode slowly in humid conditions. A quick wipe with a dry cloth before storage and a check for bent pins before connecting to your power station costs nothing and prevents a lot of frustration.

    MPPT vs. PWM Controllers

    If your panel connects to a battery or power station, something has to manage the charge. Many portable power stations have MPPT (Maximum Power Point Tracking) charge controllers built in. MPPT controllers continuously find the optimal voltage-current combination from the panel, squeezing out significantly more usable energy — typically 20–30% more than older PWM (Pulse Width Modulation) controllers under real-world conditions.

    If you’re connecting to a standalone battery bank rather than an all-in-one portable power station, this matters a lot. Using a cheap PWM controller with a high-efficiency panel is a real waste of potential. The controller is worth spending on.

    Durability in the Field

    The fabric casing on most collapsible solar panels is more durable than it looks, but it’s not indestructible. The weak points are typically the cable exit points where wires enter the case, and the stitching at fold lines. Both can fail under sustained tension — if you’re hanging a panel by its grommets in wind, the fabric takes stress at the attachment points every time it flexes.

    Water resistance varies. Many panels carry an IP rating for splash resistance, but few are submersible. Leaving a panel out in heavy rain is generally fine; leaving it pooled in standing water is not.

    Long-term UV exposure degrades the fabric case faster than the cells themselves. The cells are typically under tempered glass or a durable film and outlast the case by years. If you use these panels heavily, you’re more likely to replace the case or connectors than the cells.

    Pairing Panels With a Portable Power Station

    This is where collapsible solar panels reach their full potential. A portable power station with a decently sized battery and MPPT solar input, paired with two or three folding panels daisy-chained in parallel, can handle a weekend off-grid with real comfort — LED lighting, phone charging, a small fan, maybe a CPAP machine.

    The math matters here. Check the maximum solar input wattage your power station accepts before buying panels. Many mid-range units cap solar input at 150W or 200W. Running 400W of panels into a 150W-limited input wastes two-thirds of your panels’ capacity. Match the panel array to what your power station can actually absorb.

    Also watch the voltage window. Portable power stations specify a solar input voltage range — often something like 12–50V. Too low and the controller won’t engage; too high and you risk damage. When wiring panels in series (which raises voltage) versus parallel (which raises amperage), check your numbers before connecting.

    One Last Practical Note

    Sunlight hours aren’t all equal. The two hours around solar noon — typically 11am to 1pm local time — produce more energy than the four hours on either side combined. If you can only orient your panel once per day and then leave it, aim for noon-sun positioning rather than optimizing for morning or late afternoon.

  • Portable Vehicle Charger: How It Works and What to Expect

    Portable Vehicle Charger: How It Works and What to Expect

    What a Portable Vehicle Charger Actually Does

    Disclosure: This page contains affiliate links, and we may earn a commission if you purchase through them.

    A portable vehicle charger is exactly what it sounds like — a charging unit you can take with you rather than one bolted to a wall in your garage. No fixed installation, no dedicated circuit (usually), no electrician required. You plug one end into a power source and the other into your car. Simple in concept. Considerably more nuanced in practice.

    If you drive an electric vehicle or plug-in hybrid, you’ve probably already dealt with the reality that range anxiety isn’t always about the battery — sometimes it’s about not knowing whether you’ll have access to a usable outlet at your destination. A portable vehicle charger is the answer to that specific problem. Not a perfect answer, but a real one.


    The Two Fundamentally Different Types

    Level 1: The One That Comes in the Box

    Most EVs and PHEVs ship with a portable Level 1 charger, sometimes called an EVSE (Electric Vehicle Supply Equipment). These run on a standard 120V household outlet and typically deliver somewhere between 1 and 1.4 kW of power.

    That sounds modest — because it is. Roughly 3 to 5 miles of range per hour of charging is the realistic expectation. Overnight you might recover 40 to 50 miles. For a plug-in hybrid with a small battery pack, that’s often plenty. For a long-range EV, it’s slow but still functional if you have 8 to 10 hours to spare.

    Where Level 1 shines: road trips where you’re staying overnight somewhere with only a regular outlet, camping with a generator or portable power station, or topping off at a friend’s house. It’s not exciting, but it works reliably and there’s almost always a 120V outlet nearby.

    Level 2: Portable but Faster

    Portable Level 2 chargers operate on 240V — the same voltage as a clothes dryer or oven — and require either a compatible outlet (like a NEMA 14-50 or 6-50) or a hardwired connection. The payoff is real: typical output runs 3.3 kW to 7.2 kW, which translates to roughly 15 to 25 miles of range per hour depending on your car’s onboard charger capacity.

    These units are physically larger and heavier than a Level 1 cable, but many fit in a duffel bag or carry case. Some are dual-voltage, meaning you can plug them into a standard 120V outlet and they’ll drop down to Level 1 speeds automatically. That flexibility is genuinely useful.

    The catch is outlet availability. NEMA 14-50 receptacles are common at RV parks, some vacation rentals, and workplaces that have added them. If you’re traveling and plan to use a portable Level 2 charger regularly, calling ahead to verify outlet availability saves real headaches.


    What Actually Determines Your Charging Speed

    This is where a lot of people get confused. The charger itself is only one variable.

    Your car’s onboard charger is the ceiling. Every EV and PHEV has an internal charger that converts AC power from the outlet to the DC power the battery stores. If your car accepts a maximum of 7.2 kW on AC Level 2, connecting a portable charger rated for 11.5 kW gives you exactly zero benefit. The car limits the intake regardless.

    The outlet matters just as much as the unit. A portable Level 2 charger rated for 40 amps plugged into a circuit with a 20-amp breaker will trip that breaker or throttle itself down. Portable chargers typically have adjustable amperage settings specifically for this reason — you set it to match what the circuit can safely handle.

    Cable length and gauge add resistance. Using a cheap extension cord with a portable vehicle charger is genuinely risky, not just inefficient. If an extension cord is unavoidable, it needs to be rated for the amperage and kept as short as possible. Most manufacturers advise against extension cords entirely for Level 2 units.

    Temperature affects both ends. Cold batteries charge more slowly regardless of what you plug in — the battery management system deliberately limits charge rate to protect the cells. Extremely hot ambient temperatures can also trigger thermal throttling. Neither of these is something the charger controls.


    Portable Power Stations as a Charging Source

    One setup that’s become genuinely practical in the last few years: using a large portable power station to charge through a portable vehicle charger. This works, but comes with real caveats.

    A high-capacity portable power station — think 2 kWh or above — with a 120V inverter output can run a Level 1 charger and deliver meaningful range in a pinch. Some larger units now offer 240V output or pass-through charging, which opens the door to running a portable Level 2 charger from them.

    The math requires honesty though. Inverter losses mean you won’t get 100% of the station’s rated capacity into your car battery. Realistically, plan on 75–85% transfer efficiency on a good day. A 2 kWh station might deliver 1.5 to 1.6 kWh to the vehicle — enough to add 5 to 8 miles of range in a genuine emergency. Not a primary charging strategy, but a meaningful backup.

    Where this combo shines is overlanding, remote camping, or situations where you’ve parked somewhere without grid access overnight. Some people run a solar panel array into a portable power station and trickle charge an EV this way over multiple days. It requires patience and planning, but it’s real energy independence.


    Connector Types and Compatibility

    Connectors on the vehicle side are not universal, which catches people off guard.

    J1772 is the standard AC connector used by most non-Tesla EVs and PHEVs in North America. Nearly all portable vehicle chargers use J1772 on the car end.

    NACS (North American Charging Standard) is the connector design that originated from one automaker and has been adopted by several others as an industry standard. As more vehicles use this connector, the adapter situation becomes important — some portable chargers now include or sell compatible adapters.

    CCS and CHAdeMO are DC fast charging standards. Portable Level 1 and Level 2 chargers don’t use these — they’re AC equipment. If you’re looking at DC fast charging, you’re talking about fixed infrastructure at charging stations, not something portable in any practical sense yet.

    Always verify connector compatibility before traveling with a portable charger as your backup plan.


    Practical Usage Situations

    Hotels and short-term rentals. Most hotel rooms have standard 120V outlets. A Level 1 cable means you wake up with more range than you arrived with. Not revolutionary, but consistently useful.

    RV parks and campgrounds. These often have NEMA 14-50 or TT-30 outlets available at campsites. A portable Level 2 charger with a TT-30 adapter lets you charge at moderate speeds in genuinely remote locations. Charging rates through a TT-30 will be slower (it’s a 30-amp circuit), but you’re still talking 3–4x faster than a standard wall outlet.

    Rural destinations. Visiting family in an area with no public charging infrastructure? One call ahead to ask if they have a 240V outlet in the garage — for a welder, an air compressor, a dryer — can change the whole trip.

    Emergency range extension. This is the honest floor of what a portable vehicle charger provides. If you’re stranded with low charge, any outlet you can access turns from useless to genuinely helpful.


    Safety Isn’t Optional

    Portable chargers from reputable sources include built-in protections: ground fault detection, over-temperature shutoff, surge protection, and automatic amperage adjustment. These aren’t marketing features — they’re what separates a portable charger from a fire hazard.

    Always plug directly into a properly wired, grounded outlet. If you’re unsure whether an outlet is properly grounded, a basic outlet tester (a small device widely available for a few dollars) tells you in seconds. Never charge through an ungrounded outlet — it defeats the safety systems in the charger.

    Check the cable for damage before each use. Bent pins, cracked insulation, or a connector that doesn’t seat firmly are reasons to stop and sort the issue before charging, not after.

    A portable vehicle charger handled correctly is genuinely safe equipment. Handled carelessly, the risks are real. The margin for error on 240V circuits is thin.

  • Off Grid Inverter: How It Works and What You Actually Need

    Off Grid Inverter: How It Works and What You Actually Need

    An off grid inverter is the piece of equipment that makes the rest of your system usable. Your solar panels generate DC power. Your batteries store DC power. But your refrigerator, power tools, and phone chargers all want AC. The inverter is what bridges that gap — and choosing the wrong one, or misunderstanding how it works, is one of the most common reasons off-grid systems underperform.

    This article covers the mechanics, the types, the sizing process, and the details that actually matter in practice.

    What an Off Grid Inverter Actually Does

    At its core, an inverter takes direct current (DC) from a battery bank and converts it into alternating current (AC) that standard appliances can use. In North America that means 120V AC at 60Hz. In most of Europe and Australia, it’s 230V at 50Hz.

    The quality of that conversion matters more than most people realize. Cheap inverters produce a modified sine wave — a blocky, stepped approximation of the smooth wave that comes out of a utility outlet. That works fine for resistive loads like incandescent bulbs and simple heating elements. But motors (think well pumps, refrigerator compressors, CPAP machines), anything with a microprocessor, and most modern electronics either run poorly on modified sine wave or generate excess heat doing it.

    A pure sine wave inverter produces output that’s essentially identical to grid power. It costs more, but for a whole-house or serious off-grid setup, it’s the only sensible choice.

    The Three Main Types

    Standalone Inverters

    These convert DC to AC, full stop. They don’t charge batteries, they don’t interface with solar panels directly. You’ll typically pair them with a separate charge controller and, if you want generator backup, a separate transfer switch. They’re common in simpler DIY systems where each component is sourced and sized independently.

    Inverter-Chargers

    An inverter-charger combines an inverter with a multi-stage battery charger. When shore power or generator power is available, it charges the battery bank and can pass that AC power through to your loads simultaneously. When external power disappears, it switches to battery. This switchover happens fast — typically under 20 milliseconds — which is fast enough that most electronics don’t notice.

    For anyone running a serious off-grid cabin, a boat, or an RV where a generator is part of the picture, an inverter-charger is almost always the right call. The integration simplifies wiring considerably.

    Hybrid or Multi-Mode Inverters

    Hybrid inverters are designed to work directly with solar panels (or wind) on the DC input side, manage a battery bank, and interface with the grid or a generator. They’re common in solar-plus-storage installations. Some can prioritize solar, fall back to battery, then to grid — all automatically. These are more complex and more expensive, but for a full off-grid solar home, they eliminate the need for a separate charge controller.

    Sizing: Where Most People Go Wrong

    Sizing an off grid inverter is a two-part problem: continuous wattage and surge (or peak) wattage.

    Continuous wattage is how much power the inverter can deliver indefinitely. Add up the running wattage of every appliance you might run simultaneously. Not everything you own — what you’d realistically run at the same time. A well pump, a refrigerator, some lights, maybe a microwave. That sum is your baseline continuous requirement.

    Surge wattage matters because motors draw 2–6x their running wattage at startup. A refrigerator rated at 150 watts running might pull 600–900 watts for half a second when the compressor kicks on. A well pump can surge even higher. Your inverter needs to handle that surge without tripping or shutting down.

    The practical rule: size your inverter’s continuous rating to meet your load, and confirm its surge rating comfortably exceeds the highest-surge device in your system. A 2,000-watt continuous inverter with a 4,000-watt surge rating handles most small-cabin scenarios. A larger homestead with a well pump, workshop tools, and a full kitchen typically needs 3,000–4,000 watts continuous with surge capacity to match.

    Undersizing is the most expensive mistake. You’ll spend money on an inverter, discover it’s not enough, and spend again.

    Voltage: 12V, 24V, or 48V?

    Off grid inverters come in different input voltages — 12V, 24V, and 48V being the most common. This refers to the DC voltage of your battery bank, not the AC output.

    12V systems are fine for small loads: a van, a small cabin with modest needs, running a few lights and charging devices. Once you start pulling 1,500 watts or more, the amperage through 12V wiring gets enormous. At 12V and 2,000 watts, you’re looking at over 160 amps on the DC side. That demands very heavy, expensive cable runs and introduces real efficiency losses.

    24V systems are a reasonable middle ground for mid-sized setups.

    48V systems are the standard for any serious off-grid home. The higher voltage means lower amperage for the same power output, which means thinner (cheaper) wiring, less heat, and better overall efficiency. If you’re building a whole-house system, start at 48V.

    Efficiency and Idle Draw — Details That Add Up

    Inverter efficiency ratings (typically expressed as a percentage, often in the 90–95% range for quality pure sine wave units) tell you how much input power becomes useful output power. A 94% efficient inverter wastes 6% as heat. Over a year, on a system running around the clock, that loss is significant.

    Idle draw gets less attention but matters just as much off grid. Even with no load attached, an inverter running in standby consumes power — sometimes 10–30 watts, sometimes more. That might sound small, but 20 watts idle for 24 hours is 480 watt-hours per day. On a battery-only system, that’s real capacity being consumed doing nothing.

    Many modern inverter-chargers include a search mode or power-save mode that reduces idle draw by briefly checking for a load before fully activating. It causes a very slight delay when you turn something on, but cuts idle consumption substantially.

    Installation Realities

    An off grid inverter lives on the DC side of your system, which means it’s dealing with high-amperage, low-voltage power — exactly the conditions where improper wiring causes fires. A few non-negotiables:

    • Fuse or breaker between battery and inverter. Sized correctly for the cable, not just the inverter. This is safety-critical.
    • Cable length matters. Keep DC cable runs as short as physically possible. Long runs mean resistance, voltage drop, and heat.
    • Ventilation. Inverters generate heat under load. Don’t box them into an unventilated space.
    • Grounding. Follow the manufacturer’s grounding instructions exactly. This isn’t optional.

    Many people successfully install inverters themselves. But if your system involves whole-house loads, a generator interconnect, or utility grid interconnection, having a licensed electrician review (or complete) the AC wiring is money well spent.

    Battery Chemistry Compatibility

    Not all off grid inverters work well with all battery chemistries. Lead-acid (flooded, AGM, gel) and lithium iron phosphate (LiFePO4) have different charge profiles and different voltage ranges. An inverter-charger set up for lead-acid will overcharge lithium cells if you just swap batteries without reconfiguring it.

    Modern inverter-chargers typically have selectable battery profiles. If you’re moving to lithium or building a lithium system from scratch, confirm the inverter you’re working with explicitly supports it and that the charge parameters are adjustable.

    A Note on All-in-One Power Stations

    Portable all-in-one power stations — the kind with a built-in battery, inverter, and sometimes solar input — are a different category entirely. They’re not designed for whole-house off-grid use; they’re for camping, short outages, and supplemental power. They work well for what they are, but if someone is using the term “off grid inverter” while researching a cabin or homestead system, a portable power station isn’t the answer.

    The distinction matters because the two categories get conflated constantly. An all-in-one unit is a self-contained appliance. A purpose-built off-grid inverter is infrastructure — part of a larger system designed to run indefinitely.

    One Thing Worth Remembering

    The inverter is not where to cut corners. Panels and batteries can be upgraded incrementally. A properly sized, quality off grid inverter installed correctly — with appropriate fusing, short DC cable runs, and matched battery chemistry — will run reliably for a decade or more. A cheap undersized one will cost you twice: once to buy it, and once to replace it after it fails at exactly the wrong moment.

  • Jackery 5000: What It Is and What It Can Actually Do

    Jackery 5000: What It Is and What It Can Actually Do

    The jackery 5000 sits at the top end of what a consumer-grade portable power station can be. We’re talking about a unit with roughly 5,000 watt-hours of battery capacity — enough to run a full-size refrigerator for the better part of two days, power a window AC unit through a night, or keep a home office running through a multi-day outage without ever touching the grid. That’s not marketing language. That’s what the numbers actually support when you do the math on real-world appliance loads.

    If you searched for this and aren’t sure what you’re looking at, here’s the short version: this is a large, wheeled power station designed for serious home backup, extended off-grid use, and situations where smaller 1,000–2,000 Wh units simply run out too fast.

    What 5,000 Wh Actually Means in Practice

    Capacity numbers are easy to misread. A 5,000 Wh battery does not mean you can run a 5,000-watt appliance for an hour — real-world efficiency losses, inverter overhead, and the unit’s continuous output wattage all factor in.

    Here’s what the capacity looks like against common loads:

    • Full-size refrigerator (~150W average draw): 25–30 hours of runtime
    • CPAP machine with humidifier (~60W): 60+ hours
    • Box fan (~50W): Several days of continuous use
    • Window AC unit (~1,200W): Roughly 3–4 hours of sustained runtime
    • Portable electric heater (~1,500W): 2–3 hours
    • LED lighting throughout a small home: Days

    The AC unit and heater numbers look low, but that’s the honest math on resistive and compressor loads. For those use cases, the value isn’t infinite runtime — it’s getting you through overnight or through a gap between generator fuel runs.

    Output Wattage: The Other Number That Matters

    Capacity tells you how much energy is stored. Output wattage tells you what you can actually plug in.

    The jackery 5000 supports continuous AC output in the range of 3,000+ watts, with surge capacity higher than that to handle motor startups on compressors and pumps. That means it can run multiple high-draw appliances simultaneously — something smaller stations can’t touch.

    For perspective: a 2,000W station would shut off if you tried to run a refrigerator, a microwave, and a few lights at the same time. At this power level, that kind of simultaneous use is no longer a problem.

    Charging: Solar, AC Wall, and Car

    A power station this large takes time to recharge. That’s just physics — you’re moving a lot of electrons.

    AC wall charging is the fastest route. Depending on the unit’s charging rate and your outlet situation, expect anywhere from a few hours to most of a day for a full charge from empty.

    Solar charging is where this class of station gets genuinely interesting for off-grid use. The jackery 5000 supports high solar input wattage — enough that pairing it with a serious array of solar panels (think four to six 200W panels) can bring the unit to a full charge in a good sun day. That changes the calculus entirely. Instead of a one-time backup reserve, it becomes a renewable daily energy supply.

    Car/DC charging exists but is slow at this capacity — useful for topping off, not practical for primary charging.

    One important note: check whether your specific situation supports combined charging inputs simultaneously. Some large stations allow solar and AC to charge at the same time, which can cut total charge time meaningfully.

    Who Actually Needs This Much Capacity

    Being honest: most people don’t. A 1,000–2,000 Wh station covers weekend camping, tailgating, van life basics, and short outages for essentials. The jump to 5,000 Wh is a significant one — in size, weight, and cost.

    The jackery 5000 makes sense for:

    Homeowners in Frequent Outage Areas

    If you lose power two or three times a year for 12–48 hours at a stretch — from hurricanes, winter storms, or grid instability — this capacity actually pays for itself in peace of mind and avoided food spoilage alone.

    Remote Cabin or Off-Grid Supplemental Power

    Paired with solar panels, a station at this capacity can serve as the primary electricity source for a modest off-grid setup: lighting, device charging, a small refrigerator, and entertainment. Not whole-home replacement power, but genuine off-grid daily living.

    Medical Equipment Dependence

    Households where someone relies on powered medical devices — oxygen concentrators, CPAP, infusion pumps — benefit dramatically from extended runtime. The buffer this capacity provides isn’t a luxury; it’s safety.

    Contractors and Remote Work Sites

    Running power tools at a location without grid access is one of the original use cases for large stations. At 3,000W+ of output, circular saws, drills, and lighting all operate without issue.

    Physical Reality: This Thing Is Big

    This isn’t a unit you carry with one hand. The jackery 5000 weighs in at over 100 pounds, depending on configuration. It has wheels and a telescoping handle — which helps — but you’re not throwing this in a car trunk the way you would a smaller station.

    Planning matters. Think about:
    – Where it will live in your home (garage, closet, utility area)
    – How it gets positioned near the appliances it’ll power during an outage
    – Whether your vehicle can transport it if needed

    The size is a genuine tradeoff. It exists because lithium battery cells have a fixed energy density — 5,000 Wh simply takes up physical space and weight. There’s no workaround.

    Battery Chemistry and Longevity

    Large-capacity stations at this tier typically use lithium iron phosphate (LFP) cells rather than the older lithium-ion (NMC) chemistry. LFP matters for a few reasons:

    • Cycle life: LFP cells typically support 2,000–3,500 charge cycles before dropping to 80% capacity. At one cycle per day, that’s years of daily use.
    • Thermal stability: LFP is significantly safer under stress, heat, and abuse than NMC chemistry.
    • Longevity at partial charge: LFP handles being stored at partial states of charge better, which matters for a backup unit that might sit idle for months.

    If you’re evaluating any large power station at this capacity, confirm the battery chemistry. LFP at this price point is the right answer.

    Ports and Connectivity

    A station this size typically ships with a full complement of outputs: multiple AC outlets (often four to six), USB-A and USB-C ports at various wattages, a 12V car-style socket, and sometimes DC barrel ports. The exact configuration varies, but at this tier you generally have enough outlets to avoid the power-strip-daisy-chain problem that plagues smaller units during outages.

    Some units at this level also include app connectivity for monitoring state of charge, controlling charging schedules, and seeing real-time power draw — useful when the station is tucked in a garage and you want to check on it remotely.

    A Realistic Expectation Check

    The jackery 5000 is impressive hardware. It is not a whole-home generator replacement. It won’t run a central HVAC system, an electric range at full power, or an electric water heater for any meaningful duration. If those are the loads you need covered during an outage, a propane or natural gas standby generator is still the right tool.

    What this station does well is cover the essentials — refrigeration, lighting, device charging, medical equipment, entertainment, fans — for extended periods, silently, without fuel, and without carbon monoxide risk. That’s a meaningful set of capabilities, and for the use cases it’s genuinely suited for, it performs them better than almost anything else in a portable form factor.

    If you’re sizing up whether your needs match this capacity, sketch out your critical loads and their wattages, add them up, and estimate how many hours you’d need to run them. That math will tell you more than any spec sheet summary.

  • RV Solar Products: What They Are and How They Work

    RV Solar Products: What They Are and How They Work

    If you’ve spent any time researching power options for van life or full-time RVing, you’ve probably run into a wall of jargon. RV solar products cover a wide range of components—and the confusing part is that none of them work in isolation. A solar panel without a charge controller is a fire risk. A lithium battery bank without a proper inverter is just dead weight. Understanding how these pieces interact is what separates a system that actually powers your lifestyle from one that disappoints on the first cloudy afternoon.

    This article breaks down each major component category, explains what it does, and tells you what actually matters when evaluating one for your rig.

    The Four Core Components of Any RV Solar System

    Every functional RV solar setup, from a weekend warrior’s basic kit to a full-timer’s elaborate roof array, relies on the same four building blocks: solar panels, a charge controller, a battery bank, and an inverter. Some products combine two of these functions in one unit. That’s fine—but you still need all four functions covered.

    Solar Panels

    Panels are the obvious starting point, but the choice isn’t simply “more watts is better.” Roof space on an RV is finite and often irregular. Vents, AC units, and skylights eat into usable area fast.

    Monocrystalline vs. polycrystalline: Monocrystalline panels are more efficient per square foot, which matters a lot when your roof isn’t large. They also perform better in partial shade and high heat—both common conditions on the road. Polycrystalline panels cost less but require more surface area for the same output. For most RVers, monocrystalline is the practical choice despite the higher upfront cost.

    Rigid vs. flexible: Rigid panels mounted on aluminum frames are more durable and have better long-term performance. Flexible panels can conform to curved roofs, but they run hotter (which reduces efficiency and lifespan) and adhesive mounting creates real problems over time. Use flexible panels where rigid truly won’t fit—not as a default.

    Sizing your array: A common mistake is calculating wattage based on peak solar hours and assuming consistent output. In practice, shading, panel angle, temperature derating, and controller efficiency all reduce real-world yield. A conservative planning assumption is that you’ll harvest 70–80% of your panel’s rated wattage during usable daylight hours, averaged across the day. Run your math from there.

    Charge Controllers

    The charge controller sits between your panels and your battery bank. Its job is to regulate the voltage and current coming from the panels so the batteries charge properly without being overcharged or damaged.

    There are two types: PWM (pulse-width modulation) and MPPT (maximum power point tracking).

    PWM controllers are simple and inexpensive. They work fine in small systems where panel voltage closely matches battery voltage. In most serious RV setups, they’re not the right tool.

    MPPT controllers are more sophisticated. They continuously find the optimal operating point of the solar array and convert excess voltage into additional current—effectively squeezing more usable power out of your panels, particularly in cool weather and during morning and evening hours. The efficiency gain over PWM can be 20–30% in real-world conditions. For anything beyond a bare-minimum setup, an MPPT controller is worth the cost difference.

    What to look for: Match the controller’s maximum input voltage to your panel configuration, ensure the amperage rating has headroom above your calculated array output, and check that it supports the battery chemistry you’re using—especially important with lithium batteries, which require a different charging profile than lead-acid.

    Battery Banks

    This is where most of your system’s cost lives, and it’s the decision with the longest-lasting consequences.

    Lead-acid (AGM or flooded): Still in widespread use, and for good reason—lower upfront cost. But usable capacity is roughly 50% of rated capacity (discharging deeper damages them), they’re heavy, and they need periodic maintenance if flooded. For stationary backup use, they’re reasonable. For mobile RV use where weight and space matter, they’re increasingly hard to justify.

    Lithium iron phosphate (LiFePO4): The dominant chemistry for serious RV solar setups. Usable capacity is around 80–90% of rated capacity. They’re lighter, have a longer cycle life (often 2,000–4,000+ cycles vs. 300–500 for AGM), charge faster, and maintain stable voltage under load. The upfront cost is higher, but the cost per usable kilowatt-hour over the battery’s life often favors lithium.

    Capacity planning: Calculate your daily amp-hour draw realistically. Add up every device you run—refrigerator (often the biggest load), lights, fans, phone and laptop charging, water pump, any entertainment electronics. Then build in a buffer. Undersizing your battery bank is the most common reason RV solar systems disappoint people.

    Inverters

    Your panels, controller, and batteries all operate on DC power. Most of your appliances run on AC. The inverter bridges that gap.

    Pure sine wave vs. modified sine wave: Use pure sine wave. Modified sine wave inverters are cheaper, but they can damage sensitive electronics, cause motors to run hot, and produce audible hum in audio equipment. The price difference has narrowed enough that there’s no good reason to buy modified sine wave for an RV system.

    Sizing: Inverter capacity needs to handle your peak load—not just your average draw. An air fryer, microwave, or hair dryer can pull 1,000–1,800 watts in a burst. Add up the wattage of devices you might run simultaneously and size your inverter to handle that comfortably.

    Inverter-chargers: These combined units add shore power or generator charging capability alongside the inversion function. For full-timers who occasionally plug in at campgrounds, this integration simplifies the system and reduces wiring complexity.

    Additional RV Solar Products Worth Understanding

    Battery Monitors

    A battery monitor is not optional—it’s essential. Without one, you’re guessing at your state of charge, which leads to either underusing your battery (leaving power on the table) or overdischarging it (shortening its life). A proper shunt-based monitor measures actual current in and out of the battery bank and gives you a reliable state-of-charge reading.

    Solar Portable Power Stations

    All-in-one portable power stations combine a battery, inverter, and sometimes a charge controller in a single enclosable unit. They’re not a replacement for a roof-mounted system in most serious builds, but they fill a specific role well: weekend camping trips, supplemental power in a pinch, or situations where permanent installation isn’t practical (renters, newer rigs you don’t want to modify). Pair one with a portable folding solar panel and you have a genuinely useful standalone setup for lighter use cases.

    DC-DC Chargers

    Also called battery-to-battery chargers, these devices charge your house battery bank from your vehicle’s alternator while you drive. They’re particularly valuable for lithium systems, where the alternator’s output profile needs to be managed carefully to avoid overworking it. A quality DC-DC charger protects your alternator while ensuring your house batteries get a proper charge during transit.

    System Integration: The Part Most Guides Skip

    The biggest mistake people make with rv solar products isn’t choosing the wrong individual component—it’s failing to think about the system as a whole. Component compatibility matters:

    • Your charge controller’s charging profile must match your battery chemistry.
    • Wire gauge throughout the system must handle peak current without voltage drop or heat buildup.
    • Fuses and breakers must be appropriately sized and placed close to the battery.
    • If you’re running lithium batteries, a battery management system (BMS) is essential—most quality lithium batteries have one built in, but verify before purchasing.

    A professional RV electrical installer can review your component list before you buy anything. That one-hour consultation often saves significant money and headaches. If you’re doing it yourself, detailed wiring diagrams and load calculations should be done before ordering—not after.

    How Much Solar Is Enough?

    Honest answer: it depends on how you camp. Full hookup campers at RV parks don’t need rooftop solar at all. Weekend boondockers can often get by with 200–400 watts and a modest battery bank. Full-time off-grid travelers with a compressor refrigerator, regular laptop use, and evening lighting often need 600 watts or more paired with a substantial battery bank.

    Map your actual usage first. Then build your system to match that—not to impress fellow campers. The best rv solar products are the ones sized correctly for how you actually live, not the biggest or most expensive options available.

    The goal is reliable power that you stop thinking about. Get the system right and it disappears into the background—which is exactly where it belongs.

  • Anker Solar Panels: How They Work and What to Expect

    Anker Solar Panels: How They Work and What to Expect

    What Anker Solar Panels Actually Are

    Disclosure: This article contains affiliate links, which means we may earn a commission if you purchase through them, at no extra cost to you.

    Anker solar panels sit in a specific category: portable, foldable panels designed to pair with portable power stations rather than replace a rooftop installation. That distinction matters more than most product pages let on. If you’re expecting to run a refrigerator indefinitely or cover a house’s baseload, these aren’t that. But if you want to recharge a battery pack while camping, keep a balcony power setup topped off, or build a compact emergency system — this is exactly the right tool.

    The lineup spans from compact panels suited for phone-and-light charging all the way up to larger foldable units capable of meaningful power generation. Most use monocrystalline silicon cells, which is the right call for portable use: higher efficiency per square inch means a smaller, lighter panel that still produces useful wattage.


    Efficiency: What the Numbers Mean in Practice

    Anker solar panels advertise efficiency ratings that sound impressive on spec sheets. Here’s how to read those numbers honestly.

    Panel efficiency tells you how much of the sunlight hitting the surface actually becomes electricity. A panel rated at 23% efficiency converts 23% of incoming solar energy — the rest is lost as heat or reflection. For portable panels, anything above 20% is genuinely good. It means the panel can be physically smaller while still hitting its wattage target.

    But rated wattage assumes Standard Test Conditions: 1,000 watts of solar irradiance per square meter, a cell temperature of 25°C, and a specific light spectrum. You’ll almost never hit those conditions outdoors.

    In real use:
    – Direct midday sun in summer: you might reach 80–90% of rated output
    – Partly cloudy days: expect 40–60%, sometimes less
    – Morning or late afternoon: the angle drops output significantly
    – Hot days: cell temperature rises, and efficiency drops — sometimes by several percent

    A 100W panel on a hazy afternoon through a dirty cell surface might give you 50–60W. That’s not a flaw; it’s physics. Plan your system around realistic output, not peak ratings.


    The MPPT and MC4 Questions

    Two specs come up constantly with anker solar panels, and both are worth understanding before you connect anything.

    MPPT vs PWM Charge Controllers

    Most portable power stations use Maximum Power Point Tracking (MPPT) charge controllers internally. MPPT extracts the most power possible from a panel across varying light conditions — it constantly adjusts the electrical load to stay at the panel’s most productive operating point. This is why pairing a quality solar panel with a cheap PWM-only charge controller throws away efficiency unnecessarily.

    If you’re using anker solar panels with a compatible portable power station, the MPPT is handled for you inside the station. Just plug in and monitor output.

    Connectors and Compatibility

    Portable foldable panels typically use one of two connector types: MC4 (the industry standard for outdoor solar) or proprietary barrel-style connectors. Anker panels generally ship with adapters for multiple connection types, but always verify your power station’s input connector before assuming it’s plug-and-play.

    Paralleling two panels to double output is possible — but only when the voltage and current specs are within your power station’s input limits. Stacking wattage beyond what the charge controller can handle doesn’t speed up charging; it wastes the excess.


    Daisy-Chaining and Expandability

    One practical advantage of anker solar panels is support for chaining multiple units together. You can connect several panels in parallel to increase current (amps) while keeping voltage the same — useful if your power station accepts high amperage at a fixed voltage.

    Series wiring increases voltage, which some stations handle better than others. Read your power station’s solar input spec carefully:
    – Maximum input voltage: never exceed this; it can damage the charge controller
    – Maximum input wattage: the hard ceiling on what the station will accept
    – Recommended voltage range: the sweet spot for efficient charging

    For most portable power station setups, parallel wiring of two or three panels is the practical limit before you hit the station’s wattage ceiling anyway.


    Real-World Use Cases That Actually Work Well

    Overlanding and Van Life

    Foldable panels that lay flat on a roof rack or fold out at a campsite are a natural fit here. The compactness matters when storage space is tight. A pair of well-positioned panels can meaningfully offset how often you need shore power or generator time — not eliminate it, but reduce it significantly on sunny days.

    Balcony Power Systems

    This use case has grown fast in Europe and is catching on elsewhere. A foldable panel angled against a railing feeds a small battery, which then powers lights, a fan, or keeps devices charged. It’s not grid-scale production, but it’s real and measurable offset.

    Emergency Preparedness

    A solar panel stored flat in a closet doesn’t degrade meaningfully over years. When grid power goes out for days — after a storm, during an extended outage — a panel and a charged battery station is a genuinely useful combination. Anker solar panels with a large-capacity portable power station can handle phone charging, small appliances, a CPAP machine, and lighting for multiple days if managed carefully.

    Base Camping

    Car camping or base camping where the panel sits stationary for hours is probably the best-case scenario for output. Set it up, angle it properly, and let it run while you hike. Come back to a topped-off battery. This is where the wattage ratings come closest to real-world results.


    Getting Maximum Output: Positioning Matters More Than You Think

    Panel angle and orientation have a larger effect on output than most people expect until they test it.

    • Aim for perpendicular to the sun: the panel should face the sun directly, not at an angle. Even a 30° tilt away from optimal can cut output noticeably.
    • Avoid partial shade: a single shaded cell can drag down the whole panel’s output disproportionately because of how cells connect in series strings.
    • Keep cells clean: dust, bird droppings, and fingerprints reduce output. A quick wipe with a damp cloth before a charging session makes a real difference.
    • Reposition through the day: the sun moves. A panel optimally angled at 10am is losing output by 2pm if you haven’t adjusted it. Even one mid-day repositioning adds meaningful energy.

    Durability and Long-Term Use

    Portable solar panels take physical abuse that rooftop panels never face: folding, unfolding, being packed and unpacked, rained on, and left in hot car trunks. The weak points are almost always the cables and connectors, not the cells themselves.

    Inspect connector ends periodically. Any corrosion or physical damage to the connector is worth addressing early — a damaged connector causes resistance, which causes heat, which reduces output and can eventually cause failure.

    The cells inside anker solar panels are rated for a substantial lifespan, with gradual efficiency degradation over years. Portable use is gentler on cells than harsh rooftop UV exposure, but rougher on everything mechanical. Treat the cables with care and the panels will outlast most other gear in your kit.


    What Anker’s Solar Lineup Doesn’t Cover

    Be clear-eyed about the category limits. Anker solar panels are not designed for:
    – Permanent roof mounting
    – Grid-tied systems
    – High-voltage string installations
    – Powering heavy appliances directly without a battery buffer

    For those applications, the right tool is a different category entirely — fixed rigid panels, an inverter, and a proper charge controller.

    For portable, flexible, go-anywhere solar that pairs with modern battery storage, the ecosystem is well-designed and the components genuinely work together. Understanding exactly what you’re working with — the efficiency realities, the connector specs, the positioning discipline required — is what separates a frustrating experience from one that reliably delivers.

  • Firman Tri Fuel Generator: How It Works and Who Needs One

    Firman Tri Fuel Generator: How It Works and Who Needs One

    What a Firman Tri Fuel Generator Actually Does

    Disclosure: This site earns a small commission on qualifying purchases at no extra cost to you.

    A firman tri fuel generator is exactly what the name says — a generator engineered to run on three separate fuel sources: gasoline, liquid propane (LP), and natural gas (NG). You switch between them using a selector valve, and the carburetor or fuel system is tuned to handle all three without a conversion kit. That’s the core idea, and it’s more useful than it sounds once you think through real emergency scenarios.

    Gasoline is the default. Most people start there because it’s familiar. But gasoline goes stale, it’s in short supply after major storms, and storing large quantities creates safety and regulatory headaches. Propane stores almost indefinitely and burns cleaner. Natural gas connects to your house line, which means you never run out as long as the utility is running. Each fuel has a specific window where it’s the right call. A tri-fuel machine lets you pick that window instead of being locked in.

    How the Fuel Switching System Works

    The mechanics are straightforward. There’s a fuel selector dial — typically labeled GAS, LPG, and NG — that controls which fuel pathway is open. The carburetor on a tri-fuel unit is designed with jets and passages sized to accommodate the different energy densities of each fuel. Gasoline has the highest energy content per unit volume, propane is somewhat lower, and natural gas lower still. Because of this, you’ll see a rated wattage drop when you move away from gasoline.

    For example, a unit might produce its full rated peak wattage on gasoline, but drop to perhaps 85-90% on propane and lower still on natural gas. The exact figures vary by model, and you should check the spec sheet for whichever unit you’re looking at. The point is: this is normal and expected. It’s not a defect.

    Natural gas mode requires a dedicated hose connection to a gas line or portable tank fitting. You’ll need the right fittings and a compatible regulator — some come included, some don’t. Propane mode typically uses a standard POL or QCC1 fitting compatible with common 20 lb and 100 lb tanks.

    The Real-World Advantage of Three Fuels

    Here’s where experience matters more than spec sheets.

    During a hurricane or ice storm, gas stations run dry within hours. Everyone with a gasoline-only generator is hunting for fuel or rationing what they have. If you’ve got a 100 lb propane tank sitting next to your grill — which a lot of households already do — you have a significant backup that most neighbors don’t. And if you have a home connected to a natural gas line that stays live (which it often does even when power is out), you have essentially unlimited runtime for as long as the utility infrastructure holds.

    That natural gas connection is underrated. People focus on propane because tanks are tangible and portable. But a generator running on the house natural gas line, powering a refrigerator and a window unit through a Southern summer outage, doesn’t need you to think about refueling at all. You just run it.

    Propane wins on storage. A sealed propane tank doesn’t degrade over years the way gasoline does. If you’re prepping for infrequent emergencies and don’t want to rotate fuel stock, filling a couple of propane cylinders and leaving them in the shed is a genuinely low-maintenance approach.

    Gasoline still makes sense when you need maximum output and runtime efficiency, or when you’re already carrying gas for other equipment.

    Maintenance Differences Across Fuels

    Gasoline is hardest on the engine over time. It leaves varnish deposits if left sitting in the carburetor, which is why the standard advice is to run the carb dry before storage. Propane and natural gas burn much cleaner — less carbon buildup, fewer carb cleaning sessions, longer time between oil changes in some cases.

    That said, running on natural gas or propane doesn’t mean you skip maintenance. Oil changes still happen on schedule (check the manual — hours-based intervals are standard). Air filters still clog. Spark plugs still wear. The difference is that fuel-system maintenance becomes less frequent and less fussy.

    One practical note: if you’ve been running gasoline and want to switch to propane for storage season, run the tank low, switch the selector to propane, and let it burn through the remaining gasoline in the lines before shutting down. Cleaner handoff, less gunk sitting in the system.

    Natural Gas Connection: What You Need to Know

    Connecting to a home natural gas line isn’t plug-and-play. The generator needs to be positioned close enough to the line, you’ll need a properly rated flexible gas hose (not all hoses are appropriate for generator use), and the connection should comply with local codes. In many jurisdictions, a licensed plumber or gas fitter needs to make or inspect the connection.

    Pressure matters too. Home natural gas systems run at low pressure, and your generator needs to be compatible with that pressure range. Most tri-fuel generators designed for residential use are, but confirm before assuming.

    If you’re running long hours on natural gas — say, several days during an extended outage — the fuel savings compared to gasoline or propane can be significant, and the convenience factor is hard to overstate.

    Noise, Size, and Placement Considerations

    A firman tri fuel generator in the conventional open-frame configuration is not quiet. These are not inverter generators (though inverter models with multi-fuel capability do exist separately). Expect operational noise levels that require you to keep the unit well away from windows and sleeping areas.

    Placement also matters for fuel connections. If you’re running a natural gas line, the generator needs a semi-permanent spot. If you’re using propane tanks, you want to keep them away from the exhaust. Carbon monoxide from any generator is deadly — this isn’t abstract. These units run outdoors only, minimum 20 feet from any door, window, or vent, full stop.

    Who Gets the Most Value From Tri-Fuel Capability

    Homeowners in hurricane or ice-storm country benefit most. The ability to pivot fuel sources when one becomes unavailable is genuinely useful, not a marketing feature.

    People with existing propane infrastructure — already using propane for heating, cooking, or an auxiliary tank — have a natural fit. They’re not adding a new fuel type to manage; they’re extending what they already have.

    Small farms or rural properties on natural gas also make strong candidates. A generator on the house line covers extended outages without requiring any logistics.

    If you’re in a mild climate with rare outages and you have easy access to gasoline, the tri-fuel premium may not be worth it. A reliable single-fuel inverter generator might serve you better.

    Running Costs by Fuel Type

    Fuel costs shift constantly, but the relative picture is fairly stable. Natural gas is typically the cheapest per kilowatt-hour generated. Propane sits in the middle. Gasoline is usually most expensive and most volatile in price. The trade-off is that natural gas requires infrastructure investment upfront, and propane requires tank management. Gasoline requires neither, which is why it’s the default despite the cost.

    If you run your generator frequently — during seasonal outages, for job sites, or as part of a regular off-grid setup — those per-hour cost differences add up meaningfully over a year.

    One Underrated Feature: Peace of Mind During Prolonged Outages

    After day two of a power outage, fuel anxiety becomes a real psychological burden. People make bad decisions — driving long distances to find gas, overfilling containers, running generators unsafely close to homes. Having propane or natural gas as a fallback removes that pressure entirely. You already have fuel. You can focus on other things.

    That’s not a small thing. It’s one of the most practical arguments for tri-fuel capability, and it rarely shows up in spec comparisons.